
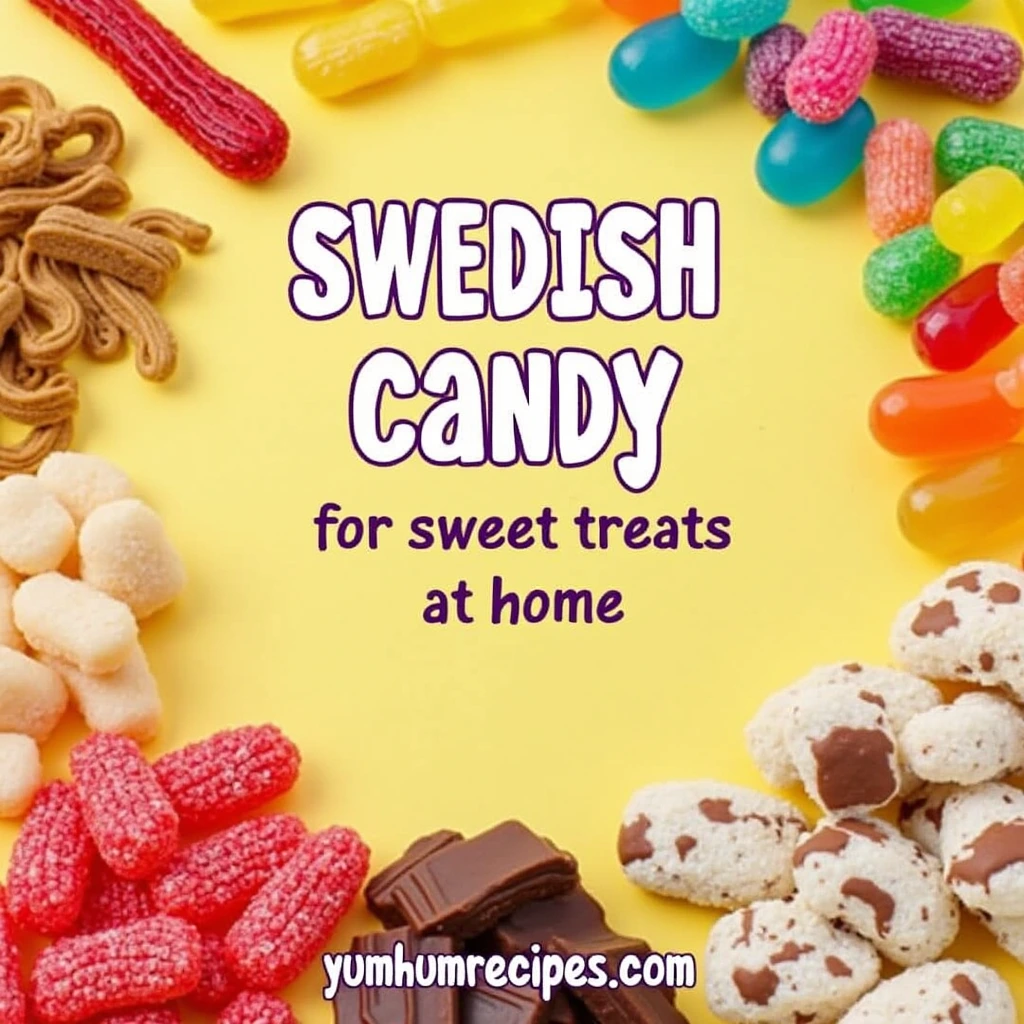
Swedish candy, known for its delightful flavors and unique textures, holds a special place in the hearts of candy lovers around the world. From the iconic salty licorice to the sweet and chewy bilar, Swedish candy offers a diverse array of treats that reflect the rich culinary traditions of Sweden. Making homemade swedish candy is not only a fun and rewarding experience but also a wonderful way to bring a taste of Sweden into your kitchen. If you enjoy creating unique flavors, you might also like our Mexican Candy recipes.
In this blog post, we will explore the fascinating world of Swedish sweets, providing you with easy recipes that you can prepare at home, similar to our Cottage Cheese Recipes and Protein Brownies. Whether you’re looking to impress your friends with traditional treats or simply satisfy your sweet tooth, these recipes will guide you through the process of creating delicious swedish candy that everyone will love. So, roll up your sleeves and get ready to embark on a sweet adventure filled with flavors that are sure to delight!
Table of Contents
Introduction to Swedish Candy
What is Swedish Candy?
Swedish candy, known for its unique flavors and textures, is a delightful representation of Sweden’s rich culinary heritage. This term encompasses a wide variety of confections that are beloved both in Sweden and around the world. From chewy licorice to creamy fudge, swedish candy offers something for every sweet tooth.
At its core, swedish candy is characterized by its high-quality ingredients and traditional recipes that have been passed down through generations. One of the most iconic types of swedish candy is licorice, which comes in various forms, including sweet, salty, and even herbal varieties. Swedish licorice is distinct for its intense flavor and chewy texture, making it a favorite among candy enthusiasts. Many people find that the unique taste of swedish licorice is unlike any other candy, often sparking a love-hate relationship among those who try it.
Another popular category of swedish candy includes chocolate confections. Swedish chocolate is renowned for its smooth texture and rich flavors, often incorporating local ingredients such as nuts and berries. Brands like Marabou and Fazer have become household names, offering a range of chocolate bars and treats that showcase the best of swedish candy craftsmanship.
In addition to licorice and chocolate, swedish candy also features a variety of gummy candies and chewy sweets. These treats, such as Bilar (car-shaped marshmallow candies) and Gott & Blandat (a mix of various candies), are often enjoyed during celebrations and special occasions. The colorful and playful nature of these candies makes them particularly appealing to children and adults alike.
Swedish candy is not just about taste; it also embodies a sense of community and tradition. In Sweden, it is common to enjoy candy during special occasions, such as holidays and birthdays, where families gather to share their favorite treats. The concept of “lördagsgodis,” or Saturday candy, is a cherished tradition where children look forward to indulging in sweets at the end of the week, reinforcing the idea that swedish candy is a treat to be savored and enjoyed.
The Appeal of Homemade Candy
The appeal of homemade candy, particularly swedish candy, lies in the unique combination of creativity, personalization, and the joy of crafting something delicious from scratch. Making swedish candy at home allows you to connect with the rich traditions of Swedish confectionery while also infusing your own flair into each treat.
One of the most significant advantages of preparing swedish candy at home is the ability to control the ingredients. Many store-bought candies contain preservatives, artificial flavors, and high levels of sugar. By making your own swedish candy, you can choose high-quality, natural ingredients that suit your taste and dietary preferences. This not only enhances the flavor but also allows you to create healthier versions of your favorite treats. For instance, you can experiment with using less sugar or incorporating organic ingredients, making your homemade swedish candy a guilt-free indulgence.
Another appealing aspect of homemade swedish candy is the opportunity for creativity. Candy making is an art form that encourages experimentation with flavors, colors, and shapes. Whether you’re crafting traditional polkagris or innovative chocolate-covered treats, the process allows you to explore your culinary skills. You can try unique flavor combinations, such as adding spices or local fruits to your swedish candy recipes, resulting in one-of-a-kind creations that reflect your personal taste.
The process of making swedish candy can also be a fun and rewarding activity to share with family and friends. Gathering loved ones in the kitchen to create sweet treats fosters a sense of community and togetherness. It’s a wonderful way to bond over shared experiences, whether you’re teaching children how to make their first batch of gummy candies or hosting a candy-making party with friends. The laughter and joy that come from creating swedish candy together can turn an ordinary day into a memorable occasion.
Moreover, homemade swedish candy makes for thoughtful gifts. There’s something special about giving a jar of your homemade treats to friends and family. It shows that you’ve put time and effort into creating something unique just for them. Whether it’s for a birthday, holiday, or just because, gifting homemade swedish candy adds a personal touch that store-bought sweets simply can’t match.
Finally, the satisfaction of enjoying a piece of swedish candy that you’ve made yourself is unparalleled. The first bite of your homemade creation, whether it’s a chewy licorice or a rich chocolate fudge, brings a sense of accomplishment and joy. You can take pride in knowing that you’ve crafted something delicious and shared it with others, making the experience even sweeter.
Essential Ingredients for Swedish Candy

Creating delicious swedish candy at home begins with understanding the essential ingredients that define these delightful treats. Each type of swedish candy has its unique flavor profile and texture, but there are several key ingredients that are commonly used across various recipes. Familiarizing yourself with these ingredients will not only enhance your candy-making skills but also allow you to appreciate the traditional aspects of swedish candy.
1. Sugar
Sugar is the cornerstone of most swedish candy recipes. It provides sweetness and is crucial for achieving the right texture in candies like fudge, licorice, and gummies. In swedish candy making, granulated sugar is often used, but other forms such as brown sugar or powdered sugar may also be incorporated for specific recipes. Understanding how sugar interacts with other ingredients is essential, as it affects the candy’s consistency and flavor.
2. Glucose Syrup
Glucose syrup is another vital ingredient in many swedish candy recipes. It helps to prevent crystallization, ensuring that your candies have a smooth and chewy texture. This syrup is particularly important in recipes for chewy candies like polkagris and gummy sweets. By adding glucose syrup, you can achieve that perfect, melt-in-your-mouth quality that is characteristic of authentic swedish candy.
3. Gelatin
For those making gummy candies or marshmallows, gelatin is an essential ingredient. This natural thickening agent gives swedish candy its signature chewy texture. When dissolved in warm liquid, gelatin creates a gel-like consistency that is perfect for forming shapes and providing that satisfying bite. For vegetarian or vegan alternatives, agar-agar can be used as a substitute, allowing you to create delicious swedish candy that caters to different dietary preferences.
4. Flavorings and Extracts
Flavorings play a crucial role in defining the taste of swedish candy. Traditional flavors such as peppermint, anise, and licorice are commonly used in swedish candy recipes. For example, polkagris is known for its refreshing peppermint flavor, while swedish licorice often features a distinct anise taste. Additionally, vanilla extract is frequently added to enhance the overall flavor profile of chocolate confections and fudge. Experimenting with different flavorings allows you to create unique variations of classic swedish candy.
5. Cocoa Powder and Chocolate
For chocolate-based swedish candy, high-quality cocoa powder and chocolate are essential. Swedish chocolate is renowned for its rich flavor and smooth texture, making it a favorite for creating treats like chocolate fudge and chocolate-covered candies. When selecting chocolate, look for options with a high cocoa content for a more intense flavor. Melting chocolate can also be used to coat other candies, adding a layer of indulgence to your homemade swedish candy creations.
6. Nuts and Fruits
Incorporating nuts and fruits into your swedish candy recipes can add texture and flavor complexity. Almonds, hazelnuts, and walnuts are popular choices that can be used in various swedish candy recipes, especially in chocolate confections. Dried fruits, such as cranberries or apricots, can also be added to enhance the sweetness and provide a chewy contrast. These ingredients not only elevate the taste of your swedish candy but also contribute to its visual appeal.
7. Food Coloring
While not essential for flavor, food coloring can be a fun addition to your swedish candy-making process. Bright colors can make your candies visually appealing, especially for festive occasions or themed events. Whether you’re making colorful gummy candies or decorating chocolate treats, food coloring allows you to unleash your creativity and make your swedish candy stand out.
Classic Swedish Candy Recipes
Easy Polkagris (Swedish Peppermint Candy)
 - A Classic Swedish Candy")
Polkagris, a beloved type of swedish candy, is a traditional peppermint candy that has been enjoyed in Sweden for centuries. Known for its distinctive striped appearance and refreshing flavor, polkagris is not only a treat for the taste buds but also a delightful visual experience. Making polkagris at home is easier than you might think, and it allows you to customize the flavor and texture to your liking. Here’s a simple recipe to help you create your own batch of this iconic swedish candy.
Ingredients
To make easy polkagris, you will need the following ingredients:
- 2 cups granulated sugar: This is the primary sweetener that gives polkagris its characteristic sweetness.
- 1/2 cup glucose syrup: This ingredient helps prevent crystallization, ensuring a smooth texture.
- 1/2 cup water: Used to dissolve the sugar and create the candy mixture.
- 1 teaspoon peppermint extract: This provides the signature minty flavor that makes polkagris so refreshing.
- Red food coloring: Optional, for creating the classic red and white striped appearance.
- Cornstarch: For dusting the work surface to prevent sticking.
Instructions
- Prepare Your Workspace: Start by preparing your workspace. Lightly dust a clean surface with cornstarch to prevent the candy from sticking. Have your candy thermometer ready, as you will need it to monitor the temperature of the sugar mixture.
- Combine Ingredients: In a medium-sized saucepan, combine the granulated sugar, glucose syrup, and water. Stir the mixture over medium heat until the sugar has completely dissolved.
- Cook the Mixture: Once the sugar has dissolved, increase the heat and bring the mixture to a boil. Do not stir once it starts boiling, as this can cause crystallization. Use your candy thermometer to monitor the temperature. You want to cook the mixture until it reaches 300°F (hard crack stage).
- Add Flavor and Color: Once the mixture reaches the desired temperature, remove it from the heat. Allow it to cool for a minute, then carefully stir in the peppermint extract. If you want to create the classic red and white stripes, divide the mixture in half. Leave one half clear and add a few drops of red food coloring to the other half, mixing until you achieve the desired color.
- Shape the Candy: Allow the candy to cool slightly until it is safe to handle but still pliable. Grease your hands lightly with cornstarch to prevent sticking. Take a piece of the clear candy and roll it into a long rope. Then, take a piece of the red candy and do the same. Twist the two ropes together to create a striped effect. Roll the twisted candy into a thicker rope, then cut it into bite-sized pieces.
- Let It Set: Place the cut pieces of polkagris on a parchment-lined baking sheet to cool completely. Once cooled, your homemade swedish candy is ready to be enjoyed!
Tips for Success
- Temperature Monitoring: Using a candy thermometer is crucial for achieving the right texture in your polkagris. If the mixture is undercooked, it will be too soft; if overcooked, it will become too hard.
- Flavor Variations: While peppermint is the traditional flavor for polkagris, you can experiment with other flavors such as spearmint or even fruit extracts for a unique twist on this classic swedish candy.
- Storage: Store your homemade polkagris in an airtight container at room temperature. Properly stored, it can last for several weeks, making it a great treat to share with friends and family.
Simple Swedish Chocolate Fudge

Swedish chocolate fudge is a rich and creamy treat that embodies the essence of swedish candy. Known for its smooth texture and decadent flavor, this fudge is a favorite among chocolate lovers and is perfect for any occasion. Whether you’re celebrating a special event or simply indulging in a sweet craving, making your own chocolate fudge at home is both easy and rewarding. Here’s a simple recipe to help you create this delightful swedish candy.
Ingredients
To make simple Swedish chocolate fudge, you will need the following ingredients:
- 2 cups semi-sweet chocolate chips: The star ingredient that provides the rich chocolate flavor.
- 1 can (14 ounces) sweetened condensed milk: This adds creaminess and sweetness to the fudge.
- 1/4 cup unsalted butter: For a smooth texture and rich flavor.
- 1 teaspoon vanilla extract: Enhances the overall flavor of the fudge.
- Pinch of salt: Balances the sweetness and enhances the chocolate flavor.
- Optional toppings: Chopped nuts, sprinkles, or sea salt for added texture and flavor.
Instructions
- Prepare Your Pan: Start by lining an 8-inch square baking dish with parchment paper, leaving some overhang on the sides for easy removal later. This will help prevent the fudge from sticking and make it easier to cut into squares.
- Melt the Chocolate Mixture: In a medium saucepan over low heat, combine the semi-sweet chocolate chips, sweetened condensed milk, and unsalted butter. Stir continuously until the chocolate and butter are completely melted and the mixture is smooth. Be careful not to let it boil, as this can affect the texture of your fudge.
- Add Flavorings: Once the chocolate mixture is smooth, remove it from the heat. Stir in the vanilla extract and a pinch of salt. Mixing in these ingredients enhances the flavor profile of your fudge, making it even more delicious.
- Pour and Spread: Pour the chocolate mixture into the prepared baking dish. Use a spatula to spread it evenly, ensuring that it reaches the corners of the dish. If you’re adding toppings, sprinkle them over the top of the fudge while it’s still warm, gently pressing them in to ensure they stick.
- Chill the Fudge: Allow the fudge to cool at room temperature for about 30 minutes, then transfer it to the refrigerator. Let it chill for at least 2 hours, or until it is firm enough to cut into squares.
- Cut and Serve: Once the fudge is set, use the overhanging parchment paper to lift it out of the baking dish. Place it on a cutting board and cut it into small squares. Your homemade Swedish chocolate fudge is now ready to be enjoyed!
Tips for Success
- Quality Chocolate: Using high-quality chocolate chips will significantly enhance the flavor of your fudge. Look for brands that use real cocoa butter for the best results.
- Add-Ins and Variations: Feel free to customize your fudge by adding ingredients like chopped nuts, dried fruits, or even a swirl of peanut butter for a unique twist on this classic swedish candy.
- Storage: Store your chocolate fudge in an airtight container at room temperature for up to a week. For longer storage, keep it in the refrigerator, where it can last for up to two weeks.
Homemade Swedish Licorice

Homemade Swedish licorice is a unique and flavorful treat that captures the essence of traditional swedish candy. Known for its distinct taste and chewy texture, Swedish licorice is a beloved confection that has a special place in the hearts of many candy enthusiasts. Making your own licorice at home allows you to customize the flavor and texture to your liking, ensuring a delightful experience with every bite. Here’s a simple recipe to help you create this iconic swedish candy.
Ingredients
To make homemade Swedish licorice, you will need the following ingredients:
- 1 cup granulated sugar: This is the primary sweetener that gives the licorice its sweetness.
- 1/2 cup light corn syrup: This ingredient helps to achieve the chewy texture characteristic of licorice.
- 1/4 cup water: Used to dissolve the sugar and create the candy mixture.
- 1/4 cup unsweetened cocoa powder: Adds depth of flavor and a hint of bitterness that balances the sweetness.
- 1 tablespoon anise extract: This is the key flavoring that gives Swedish licorice its distinctive taste. You can also use a combination of anise and fennel extracts for a more complex flavor.
- 1 tablespoon black food coloring: Optional, for achieving the classic dark color of licorice.
- 1/4 teaspoon salt: Enhances the overall flavor of the licorice.
Instructions
- Prepare Your Workspace: Start by greasing a small baking dish or a silicone mold with cooking spray or oil. This will prevent the licorice from sticking and make it easier to remove once it’s set.
- Combine Ingredients: In a medium saucepan, combine the granulated sugar, corn syrup, and water. Stir the mixture over medium heat until the sugar has completely dissolved.
- Add Cocoa and Flavoring: Once the sugar has dissolved, add the unsweetened cocoa powder, anise extract, and salt to the saucepan. Stir continuously until the mixture is smooth and well combined. If you’re using black food coloring, add it at this stage and mix until the color is evenly distributed.
- Cook the Mixture: Increase the heat to medium-high and bring the mixture to a boil. Allow it to boil without stirring until it reaches 250°F (hard ball stage) on a candy thermometer. This step is crucial for achieving the right texture in your licorice.
- Cool and Knead: Once the mixture reaches the desired temperature, remove it from the heat and let it cool for a few minutes until it’s safe to handle. Once it’s cool enough, pour the mixture onto a clean, greased surface. Allow it to cool slightly more, then begin kneading the mixture with your hands. Knead until it becomes smooth and pliable, similar to dough.
- Shape the Licorice: Divide the kneaded licorice into smaller portions if desired. Roll each portion into long ropes, about 1/4 inch thick. You can also cut the ropes into bite-sized pieces or use cookie cutters to create fun shapes.
- Let It Set: Place the shaped licorice on a parchment-lined baking sheet and let it sit at room temperature for several hours or until it has firmed up. Once set, your homemade Swedish licorice is ready to be enjoyed!
Tips for Success
- Flavor Variations: While anise is the traditional flavor for Swedish licorice, you can experiment with other flavors such as mint or citrus for a unique twist on this classic swedish candy.
- Texture Adjustments: If you prefer a softer licorice, reduce the cooking time slightly. For a firmer texture, allow it to cook a bit longer.
- Storage: Store your homemade licorice in an airtight container at room temperature. Properly stored, it can last for several weeks, making it a great treat to share with friends and family.
Fruity and Chewy Swedish Candies
Making Bilar (Swedish Car Candy)
 - A Fun Swedish Candy Experience")
Bilar, often referred to as Swedish car candy, is a beloved treat that has captured the hearts of candy lovers both in Sweden and around the world. Known for its delightful marshmallow texture and fruity flavors, Bilar is shaped like little cars, making them not only tasty but also fun to eat. Making your own Bilar at home is a rewarding experience that allows you to enjoy this iconic swedish candy in a fresh and personalized way. Here’s a simple recipe to help you create your own batch of Bilar.
Ingredients
To make Bilar, you will need the following ingredients:
- 1 cup granulated sugar: This is the primary sweetener that gives Bilar its sweetness.
- 1/2 cup light corn syrup: This ingredient helps achieve the chewy texture characteristic of marshmallow candies.
- 1/4 cup water: Used to dissolve the sugar and create the candy mixture.
- 1 tablespoon unflavored gelatin: This is essential for giving Bilar its signature chewy texture.
- 1/2 teaspoon vanilla extract: Enhances the overall flavor of the candy.
- 1/2 teaspoon fruit flavoring: You can use flavors like strawberry, raspberry, or lemon to create a fruity taste.
- Food coloring: Optional, for adding vibrant colors to your candy.
- Cornstarch: For dusting the work surface and preventing sticking.
Instructions
- Prepare Your Workspace: Start by lightly dusting a clean surface or a silicone mold with cornstarch to prevent the candy from sticking. This will make it easier to shape the Bilar later.
- Bloom the Gelatin: In a small bowl, combine the unflavored gelatin with 1/4 cup of cold water. Let it sit for about 5 minutes to allow the gelatin to bloom and soften.
- Combine Sugar and Syrup: In a medium saucepan, combine the granulated sugar, corn syrup, and 1/4 cup of water. Stir the mixture over medium heat until the sugar has completely dissolved.
- Add Gelatin and Flavoring: Once the sugar mixture is dissolved, add the bloomed gelatin to the saucepan. Stir continuously until the gelatin is fully dissolved. Remove the saucepan from the heat and stir in the vanilla extract and your chosen fruit flavoring. If you want to add food coloring, this is the time to do it. Mix until the color is evenly distributed.
- Cook the Mixture: Return the saucepan to low heat and cook the mixture for an additional 5-10 minutes, stirring constantly. This step helps to achieve the right consistency for your Bilar. You want the mixture to be thick but still pourable.
- Pour and Set: Carefully pour the mixture into the prepared mold or onto the dusted surface. Allow it to cool at room temperature for about 30 minutes, then transfer it to the refrigerator to set for at least 2 hours or until firm.
- Shape the Bilar: Once the candy has set, remove it from the mold or cut it into squares if you poured it onto a surface. Dust your hands with cornstarch to prevent sticking, and shape the candy into small car shapes. If you have a car-shaped cookie cutter, you can use that for uniformity.
- Coat and Store: Once shaped, dust the Bilar with additional cornstarch to prevent them from sticking together. Store your homemade Swedish car candy in an airtight container at room temperature. They can last for several weeks, making them a perfect treat to share with friends and family.
Tips for Success
- Flavor Combinations: Feel free to experiment with different fruit flavors to create a variety of Bilar. Mixing flavors can lead to exciting combinations that enhance the overall experience of this swedish candy.
- Texture Adjustments: If you prefer a firmer candy, allow the mixture to cook a bit longer. For a softer texture, reduce the cooking time slightly.
- Presentation: Consider packaging your homemade Bilar in clear bags or jars tied with ribbons for a charming gift idea. They make great party favors or sweet treats for special occasions.
Easy Swedish Gummy Candy

Easy Swedish gummy candy is a delightful treat that captures the essence of swedish candy with its chewy texture and vibrant flavors. These gummies are not only fun to make but also allow for endless creativity in terms of shapes and flavors. Whether you’re looking to recreate classic Swedish gummy candies or experiment with your own unique combinations, this simple recipe will guide you through the process of making your own delicious gummy treats at home.
Ingredients
To make easy Swedish gummy candy, you will need the following ingredients:
- 1 cup fruit juice: Choose your favorite juice, such as apple, raspberry, or orange, for a natural flavor base. You can also use a combination of juices for a more complex taste.
- 1/4 cup granulated sugar: This adds sweetness to your gummies. Adjust the amount based on the sweetness of your juice.
- 2 tablespoons unflavored gelatin: This is the key ingredient that gives gummy candy its chewy texture.
- 1 tablespoon lemon juice: This adds a touch of acidity to balance the sweetness and enhance the flavor.
- Optional food coloring: If you want to enhance the color of your gummies, you can add a few drops of food coloring that complements your chosen juice.
- Cornstarch: For dusting the molds to prevent sticking.
Instructions
- Prepare Your Molds: Start by lightly dusting gummy molds or a silicone mold with cornstarch. This will help prevent the gummy candy from sticking and make it easier to remove once set.
- Combine Ingredients: In a small saucepan, combine the fruit juice, granulated sugar, and lemon juice. Stir the mixture over medium heat until the sugar has completely dissolved. This step is crucial for ensuring that your gummies are sweet and flavorful.
- Bloom the Gelatin: In a separate small bowl, sprinkle the unflavored gelatin over 1/4 cup of cold water. Let it sit for about 5 minutes to allow the gelatin to bloom and soften. This step is essential for achieving the right texture in your gummy candy.
- Heat the Mixture: Once the sugar has dissolved in the juice mixture, remove the saucepan from the heat. Add the bloomed gelatin to the warm juice mixture and stir until the gelatin is completely dissolved. If you’re using food coloring, add it at this stage and mix until the color is evenly distributed.
- Pour into Molds: Carefully pour the gelatin mixture into the prepared molds. If you don’t have molds, you can pour the mixture into a shallow dish and cut it into squares later. Allow the mixture to cool slightly before transferring it to the refrigerator.
- Chill and Set: Place the filled molds in the refrigerator and let them chill for at least 2-3 hours, or until the gummies are firm and set. The longer you let them chill, the firmer they will become.
- Remove and Dust: Once the gummies are set, carefully remove them from the molds. If you poured the mixture into a dish, cut it into bite-sized squares. Dust the gummies lightly with cornstarch to prevent them from sticking together.
- Store and Enjoy: Store your homemade Swedish gummy candy in an airtight container at room temperature or in the refrigerator. They can last for up to a week, making them a perfect treat to enjoy or share with friends and family.
Tips for Success
- Flavor Variations: Feel free to experiment with different fruit juices to create a variety of flavors. You can also mix juices for unique combinations, such as combining apple and raspberry for a delicious twist.
- Texture Adjustments: If you prefer a firmer gummy, increase the amount of gelatin slightly. For a softer texture, reduce the gelatin or add a bit more juice.
- Creative Shapes: Use fun-shaped molds to make your gummies more visually appealing. You can find molds in various shapes, from animals to fruits, which can make your swedish candy even more exciting.
Fluffy Fruit-Flavored Marshmallows

Fluffy fruit-flavored marshmallows are a delightful addition to the world of swedish candy. Known for their light, airy texture and vibrant flavors, these marshmallows are perfect for snacking, adding to desserts, or even enjoying in a warm cup of hot chocolate. Making your own marshmallows at home is surprisingly easy and allows you to customize the flavors to suit your taste. Here’s a simple recipe to help you create these delicious treats.
Ingredients
To make fluffy fruit-flavored marshmallows, you will need the following ingredients:
- 1 cup granulated sugar: This is the primary sweetener that gives the marshmallows their sweetness.
- 1/2 cup light corn syrup: This ingredient helps achieve the marshmallow’s signature fluffy texture.
- 1/4 cup water: Used to dissolve the sugar and create the syrup mixture.
- 2 tablespoons unflavored gelatin: This is essential for giving marshmallows their characteristic structure and fluffiness.
- 1/2 cup cold water: For blooming the gelatin.
- 1 teaspoon vanilla extract: Enhances the overall flavor of the marshmallows.
- 1/2 teaspoon fruit extract: Choose your favorite flavor, such as strawberry, raspberry, or lemon, to give your marshmallows a fruity twist.
- Optional food coloring: For adding vibrant colors to your marshmallows.
- Powdered sugar and cornstarch: For dusting the marshmallows to prevent sticking.
Instructions
- Prepare Your Pan: Start by greasing an 8×8-inch baking dish or lining it with parchment paper. Dust the bottom and sides with a mixture of powdered sugar and cornstarch to prevent the marshmallows from sticking.
- Bloom the Gelatin: In a small bowl, combine the unflavored gelatin with 1/2 cup of cold water. Let it sit for about 5-10 minutes to allow the gelatin to bloom and soften. This step is crucial for achieving the right texture in your marshmallows.
- Make the Sugar Syrup: In a medium saucepan, combine the granulated sugar, light corn syrup, and 1/4 cup of water. Stir the mixture over medium heat until the sugar has completely dissolved. Once dissolved, increase the heat and bring the mixture to a boil without stirring. Use a candy thermometer to monitor the temperature, cooking until it reaches 240°F (soft ball stage).
- Combine Gelatin and Syrup: Once the sugar syrup reaches the desired temperature, remove it from the heat. Carefully pour the hot syrup into the bowl with the bloomed gelatin. Stir until the gelatin is completely dissolved. This mixture will be very hot, so take care to avoid burns.
- Whip the Mixture: Using a stand mixer or a hand mixer, beat the gelatin and syrup mixture on high speed for about 10-15 minutes, or until it becomes thick, fluffy, and white. During the last minute of mixing, add the vanilla extract, fruit extract, and any food coloring you desire. Continue to mix until everything is well combined.
- Pour and Set: Pour the fluffy marshmallow mixture into the prepared baking dish, using a spatula to spread it evenly. Dust the top with more powdered sugar and cornstarch to prevent sticking. Allow the marshmallows to set at room temperature for at least 4 hours, or overnight for best results.
- Cut and Dust: Once the marshmallows are set, remove them from the pan using the parchment paper (if used). Dust a clean surface with powdered sugar and cornstarch, and turn the marshmallows out onto it. Use a sharp knife or pizza cutter to cut them into squares or desired shapes. Dust the cut edges with more powdered sugar and cornstarch to prevent sticking.
- Store and Enjoy: Store your homemade fluffy fruit-flavored marshmallows in an airtight container at room temperature. They can last for up to two weeks, making them a perfect treat to enjoy or share with friends and family.
Tips for Success
- Flavor Combinations: Feel free to experiment with different fruit extracts to create a variety of flavors. You can also mix flavors for a fun twist, such as combining strawberry and lemon for a refreshing taste.
- Texture Adjustments: If you prefer denser marshmallows, you can reduce the whipping time slightly. For lighter, fluffier marshmallows, whip them for a longer period.
- Creative Shapes: Use cookie cutters to create fun shapes for special occasions. You can also dip the marshmallows in chocolate for an extra indulgent treat.
Unique Swedish Candy Creations
Chocolate-Covered Swedish Treats

Chocolate-covered Swedish treats are a delightful indulgence that perfectly combines the rich, creamy flavor of chocolate with the unique textures and tastes of traditional swedish candy. These treats are not only delicious but also visually appealing, making them perfect for special occasions, gifts, or simply as a sweet snack. In this section, we’ll explore some popular Swedish treats that can be easily transformed into chocolate-covered delights, along with a simple method for making them at home.
Popular Swedish Treats to Cover in Chocolate
- Swedish Licorice: Known for its distinct flavor, Swedish licorice is a beloved candy that pairs beautifully with chocolate. The combination of sweet and salty flavors creates a unique taste experience that is sure to please licorice lovers.
- Polkagris (Peppermint Candy): These traditional peppermint sticks can be crushed and used as a topping for chocolate-covered treats or dipped whole into chocolate for a refreshing twist.
- Bilar (Swedish Car Candy): These soft, chewy car-shaped gummies are a fun treat to cover in chocolate. The sweetness of the gummies contrasts wonderfully with the rich chocolate coating.
- Marzipan: A classic Swedish confection made from almond paste, marzipan can be shaped into various forms and covered in chocolate for an elegant treat that is both sweet and nutty.
- Swedish Chocolate Fudge: This rich and creamy fudge can be dipped in chocolate for an extra layer of decadence, making it a perfect addition to any dessert platter.
Ingredients
To make chocolate-covered Swedish treats, you will need the following ingredients:
- Your choice of Swedish treats: Select from the options mentioned above or any other favorite Swedish candy.
- 8 ounces of high-quality chocolate: You can use dark, milk, or white chocolate, depending on your preference. Chocolate chips or bars work well.
- 1 tablespoon of coconut oil or vegetable shortening: This helps to achieve a smooth and glossy finish on the chocolate coating.
- Optional toppings: Consider using crushed nuts, sprinkles, or crushed peppermint candies for added texture and flavor.
Instructions
- Prepare Your Treats: If you’re using larger Swedish treats like marzipan or fudge, cut them into bite-sized pieces. For items like licorice or polkagris, you can leave them whole or break them into smaller pieces.
- Melt the Chocolate: In a microwave-safe bowl, combine the chocolate and coconut oil (or shortening). Heat in the microwave in 30-second intervals, stirring in between, until the chocolate is completely melted and smooth. Be careful not to overheat the chocolate, as it can seize.
- Dip the Treats: Using a fork or a toothpick, dip each Swedish treat into the melted chocolate, ensuring it is fully coated. Allow any excess chocolate to drip off before placing the treat on a parchment-lined baking sheet.
- Add Toppings: If you’re using toppings, sprinkle them over the chocolate-covered treats while the chocolate is still wet. This will help the toppings adhere to the chocolate.
- Set the Chocolate: Once all the treats are coated, place the baking sheet in the refrigerator for about 30 minutes, or until the chocolate has fully set. This will give your chocolate-covered Swedish candy a nice, firm finish.
- Store and Enjoy: Once the chocolate has hardened, transfer the treats to an airtight container. They can be stored at room temperature for a few days or in the refrigerator for longer freshness. Enjoy your chocolate-covered Swedish treats as a delightful snack or share them with friends and family!
Tips for Success
- Quality Chocolate: Using high-quality chocolate will significantly enhance the flavor of your chocolate-covered treats. Look for chocolate with a high cocoa content for the best results.
- Flavor Variations: Experiment with flavored chocolates, such as orange or mint, to add an extra layer of flavor to your treats. You can also drizzle contrasting chocolate over the top for a decorative touch.
- Presentation: For a beautiful presentation, consider arranging your chocolate-covered Swedish treats on a decorative platter or in gift boxes. They make excellent gifts for holidays or special occasions.
Spiced Swedish Almonds

Spiced Swedish almonds are a delightful and crunchy treat that perfectly embodies the essence of swedish candy. These almonds are coated in a sweet and spicy mixture, making them an irresistible snack that can be enjoyed on their own or as a topping for desserts. The combination of flavors and textures makes spiced Swedish almonds a popular choice for gatherings, holiday celebrations, or simply as a delicious treat to enjoy at home. Here’s how to make this delightful confection.
Ingredients
To prepare spiced Swedish almonds, you will need the following ingredients:
- 2 cups raw almonds: Choose whole, unblanched almonds for the best texture and flavor.
- 1 cup granulated sugar: This will provide the sweetness that balances the spices.
- 1/2 cup water: Used to dissolve the sugar and create a syrup.
- 1 teaspoon ground cinnamon: Adds warmth and depth to the flavor profile.
- 1/2 teaspoon ground nutmeg: Provides a subtle spiciness that complements the cinnamon.
- 1/4 teaspoon ground cloves: Adds a fragrant and slightly sweet flavor.
- 1/4 teaspoon salt: Enhances the overall flavor of the almonds.
- 1 teaspoon vanilla extract: For an extra layer of flavor that pairs well with the spices.
Instructions
- Prepare Your Baking Sheet: Start by lining a baking sheet with parchment paper. This will prevent the almonds from sticking and make cleanup easier.
- Combine Sugar and Water: In a medium saucepan, combine the granulated sugar and water. Stir the mixture over medium heat until the sugar has completely dissolved. This will create a simple syrup that will coat the almonds.
- Add Spices: Once the sugar has dissolved, add the ground cinnamon, nutmeg, cloves, salt, and vanilla extract to the syrup. Stir well to combine all the ingredients, allowing the spices to infuse into the syrup.
- Add the Almonds: Add the raw almonds to the saucepan, stirring to ensure that they are evenly coated with the spiced syrup. Continue to cook the mixture over medium heat for about 5-7 minutes, stirring frequently. The syrup will begin to thicken and coat the almonds.
- Bake the Almonds: Preheat your oven to 350°F (175°C). Spread the coated almonds in a single layer on the prepared baking sheet. Bake in the preheated oven for about 15-20 minutes, stirring every 5 minutes to ensure even cooking. The almonds should become golden brown and fragrant.
- Cool and Separate: Once the almonds are done baking, remove them from the oven and let them cool on the baking sheet. As they cool, they will harden and become crunchy. If they stick together, gently break them apart with a spatula.
- Store and Enjoy: Once completely cooled, transfer the spiced Swedish almonds to an airtight container. They can be stored at room temperature for up to two weeks, making them a perfect snack to have on hand or to share with friends and family.
Tips for Success
- Flavor Variations: Feel free to experiment with different spices to create your own unique blend. For example, adding a pinch of cayenne pepper can give the almonds a spicy kick, while a touch of cocoa powder can add a chocolatey flavor.
- Nut Alternatives: While almonds are traditional, you can also use other nuts such as pecans, walnuts, or cashews for a different flavor and texture. Just adjust the baking time as needed, as different nuts may cook at different rates.
- Presentation: Spiced Swedish almonds make a beautiful addition to gift baskets or as party snacks. Consider packaging them in decorative jars or bags for a charming presentation.
DIY Swedish Candy Bars

Creating your own DIY Swedish candy bars is a fun and rewarding way to enjoy the delightful flavors of swedish candy right in your kitchen. These homemade treats allow you to customize ingredients and flavors, making them a perfect option for satisfying your sweet tooth or impressing friends and family. With a combination of chocolate, nougat, and various fillings, you can craft candy bars that rival your favorite store-bought versions. Here’s a simple guide to making your own delicious Swedish candy bars at home.
Ingredients
To make DIY Swedish candy bars, you will need the following ingredients:
- 1 cup milk chocolate chips: For the outer coating, providing a sweet and creamy flavor.
- 1/2 cup dark chocolate chips: Optional, for a richer chocolate flavor in the coating.
- 1/2 cup unsweetened cocoa powder: For added depth in the chocolate flavor.
- 1/2 cup granulated sugar: To sweeten the nougat filling.
- 1/4 cup corn syrup: This helps to create a chewy texture in the nougat.
- 1/4 cup unsalted butter: Adds richness to the nougat.
- 1 teaspoon vanilla extract: Enhances the flavor of the nougat.
- 1 cup crispy rice cereal: For a crunchy texture in the filling.
- 1/2 cup chopped nuts: Such as almonds or hazelnuts, for added flavor and crunch.
- Optional fillings: Consider adding caramel, fruit preserves, or even a layer of marzipan for a traditional Swedish twist.
Instructions
- Prepare Your Pan: Start by lining an 8×8-inch baking dish with parchment paper, leaving some overhang for easy removal later. This will help prevent the candy bars from sticking.
- Make the Nougat Filling: In a medium saucepan, combine the granulated sugar, corn syrup, unsalted butter, and vanilla extract. Cook over medium heat, stirring constantly until the mixture comes to a boil. Allow it to boil for about 2-3 minutes without stirring, until it reaches a soft ball stage (around 240°F or 115°C on a candy thermometer).
- Add the Crispy Rice Cereal: Remove the saucepan from the heat and quickly stir in the crispy rice cereal and chopped nuts. Mix until everything is well combined. The mixture will be sticky, so be careful not to burn yourself.
- Press into the Pan: Pour the nougat mixture into the prepared baking dish, pressing it down firmly with a spatula or your hands to create an even layer. Allow it to cool and set for about 30 minutes.
- Melt the Chocolate Coating: In a microwave-safe bowl, combine the milk chocolate chips and dark chocolate chips (if using). Heat in the microwave in 30-second intervals, stirring in between, until the chocolate is completely melted and smooth. If you prefer a thinner coating, you can add a teaspoon of coconut oil to the melted chocolate.
- Cut the Nougat into Bars: Once the nougat has set, lift it out of the pan using the parchment paper overhang. Place it on a cutting board and cut it into rectangular bars of your desired size.
- Dip the Bars in Chocolate: Using a fork or a dipping tool, dip each nougat bar into the melted chocolate, ensuring it is fully coated. Allow any excess chocolate to drip off before placing the bars back on the parchment-lined baking sheet.
- Set the Chocolate: Once all the bars are coated, place the baking sheet in the refrigerator for about 30 minutes, or until the chocolate has fully set.
- Store and Enjoy: Once the chocolate has hardened, transfer your DIY Swedish candy bars to an airtight container. They can be stored at room temperature for up to a week or in the refrigerator for longer freshness. Enjoy them as a sweet snack or share them with friends and family!
Tips for Success
- Flavor Variations: Feel free to experiment with different fillings and flavors. You can add a layer of caramel or fruit preserves between the nougat and chocolate for a unique twist. For a more traditional Swedish flavor, consider incorporating marzipan into your bars.
- Nut Alternatives: If you have nut allergies or prefer a nut-free version, you can omit the nuts or substitute them with seeds like sunflower or pumpkin seeds for added crunch.
- Decorative Touches: For a beautiful presentation, consider drizzling melted white chocolate over the top of the bars or sprinkling them with sea salt before the chocolate sets.
Tips for Perfecting Your Swedish Candy
Common Mistakes to Avoid
When making swedish candy, it’s easy to get caught up in the excitement of creating delicious treats. However, there are several common mistakes that can lead to less-than-perfect results. By being aware of these pitfalls, you can ensure that your homemade Swedish candy turns out just as delightful as you envision. Here are some key mistakes to avoid when preparing your favorite Swedish confections.
1. Skipping the Measurements
One of the most common mistakes in candy-making is not measuring ingredients accurately. Candy recipes often rely on precise measurements to achieve the right texture and flavor. For example, using too much sugar can result in overly sweet candy, while too little can lead to a lack of structure. Always use a kitchen scale or measuring cups to ensure you’re using the correct amounts, especially when making delicate swedish candy like nougat or fudge.
2. Ignoring Temperature Control
Temperature plays a crucial role in candy-making. Many recipes for swedish candy require specific temperatures to achieve the desired consistency. For instance, when making caramel or toffee, cooking the sugar syrup to the right temperature is essential for achieving the perfect chewy texture. Using a candy thermometer can help you monitor the temperature accurately. Ignoring this step can lead to burnt candy or a texture that is too hard or too soft.
3. Not Preparing Your Workspace
A cluttered or unprepared workspace can lead to chaos in the kitchen. Before you start making swedish candy, ensure that you have all your ingredients measured and ready to go. This practice, known as “mise en place,” helps streamline the process and prevents you from scrambling to find ingredients mid-recipe. Additionally, having a clean and organized workspace reduces the risk of cross-contamination and ensures a more enjoyable cooking experience.
4. Overmixing or Undermixing
When making certain types of swedish candy, such as marshmallows or nougat, the mixing process is critical. Overmixing can incorporate too much air, resulting in a light and fluffy texture that may not hold its shape. Conversely, undermixing can lead to a dense and unappealing texture. Pay close attention to the mixing instructions in your recipe, and mix just until the ingredients are combined to achieve the perfect consistency.
5. Neglecting Cooling Times
Cooling times are essential for many types of swedish candy. For example, when making chocolate-covered treats or fudge, allowing the candy to cool completely before cutting or dipping is crucial. Rushing this process can result in messy, uneven pieces or chocolate that doesn’t set properly. Be patient and give your candy the time it needs to cool and firm up for the best results.
6. Using Low-Quality Ingredients
The quality of your ingredients can significantly impact the final product. When making swedish candy, opt for high-quality chocolate, fresh nuts, and pure extracts. Using inferior ingredients can lead to bland flavors and undesirable textures. Investing in quality ingredients will enhance the overall taste and presentation of your homemade treats.
7. Not Following the Recipe
While it can be tempting to improvise or make substitutions in a recipe, doing so can lead to unexpected results, especially in candy-making. Each ingredient plays a specific role in the chemistry of the candy, and altering the recipe can affect the final outcome. Stick to the recipe, especially if you’re trying a new type of swedish candy for the first time. Once you’re comfortable with the process, you can start experimenting with variations.
8. Forgetting to Store Properly
Proper storage is essential for maintaining the freshness and quality of your swedish candy. Many candies can become sticky or lose their texture if not stored correctly. Use airtight containers to keep your treats fresh, and consider refrigerating items like chocolate-covered candies or fudge to prolong their shelf life. Additionally, be mindful of humidity, as it can affect the texture of candies like marshmallows or nougat.
Storing and Preserving Your Candy
Properly storing and preserving your homemade swedish candy is essential to maintain its freshness, flavor, and texture. Whether you’ve made chewy caramels, fluffy marshmallows, or crunchy spiced almonds, understanding the best storage methods will help you enjoy your treats for longer. Here are some key tips and techniques for storing and preserving your Swedish candy effectively.
1. Use Airtight Containers
One of the most important aspects of storing swedish candy is to keep it in airtight containers. Exposure to air can lead to moisture loss, making candies hard and stale. For soft candies like marshmallows or nougat, use containers that seal tightly to prevent them from drying out. For harder candies, such as toffees or chocolate-covered treats, airtight containers will help maintain their texture and prevent them from becoming sticky.
2. Keep Away from Heat and Light
Heat and light can significantly affect the quality of your swedish candy. Store your candies in a cool, dark place, away from direct sunlight and heat sources. A pantry or cupboard is often the best choice. Avoid storing candy near the stove or oven, as the heat can cause chocolate to melt or candies to become overly soft.
3. Refrigeration for Certain Candies
Some types of swedish candy, particularly those that contain cream or dairy, may benefit from refrigeration. For example, chocolate-covered candies or fudge can be stored in the refrigerator to prolong their freshness. However, be cautious with candies like marshmallows, as refrigeration can sometimes alter their texture, making them firmer and less fluffy. If you choose to refrigerate your candy, allow it to come to room temperature before serving for the best texture.
4. Freezing for Long-Term Storage
If you want to store your swedish candy for an extended period, freezing is an excellent option. Most candies can be frozen, but it’s essential to package them properly to prevent freezer burn. Wrap individual pieces in plastic wrap or wax paper, then place them in a freezer-safe airtight container or resealable plastic bag. Label the container with the date and type of candy for easy identification. When you’re ready to enjoy your frozen treats, allow them to thaw at room temperature before consuming.
5. Avoid Humidity
Humidity can be particularly detrimental to the quality of your swedish candy. Candies like marshmallows and gummies can become sticky and lose their desirable texture when exposed to moisture. To combat this, store your candies in a dry environment and consider using silica gel packets in your storage containers to absorb excess moisture. If you live in a humid climate, it’s especially important to monitor your candy’s storage conditions.
6. Separate Different Types of Candy
When storing various types of swedish candy, it’s best to keep them separate. Different candies have unique textures and moisture levels, which can affect each other if stored together. For example, soft candies can absorb moisture from harder candies, leading to undesirable changes in texture. Use separate containers for different types of candy to maintain their individual qualities.
7. Check for Freshness Regularly
Even with proper storage, it’s a good idea to check your swedish candy for freshness periodically. Look for any signs of spoilage, such as changes in texture, color, or odor. If you notice any issues, it’s best to discard the candy to avoid any potential health risks. Regularly checking your stored candy will help ensure that you enjoy it at its best quality.
Sharing and Gifting Your Homemade Candy
Sharing and gifting your homemade swedish candy is a wonderful way to spread joy and delight among friends, family, and colleagues. Whether it’s for a special occasion, a holiday celebration, or just because, presenting your delicious creations can make the experience even more enjoyable. Here are some tips and ideas for sharing and gifting your homemade Swedish candy in a thoughtful and creative manner.
1. Choose the Right Occasion
Homemade swedish candy makes a perfect gift for various occasions. Consider gifting your treats for:
- Holidays: Christmas, Easter, and Midsummer are great times to share Swedish candy, as they are often associated with sweet treats and celebrations.
- Birthdays: Surprise a loved one with a box of their favorite homemade candies as a unique birthday gift.
- Weddings and Showers: Create personalized candy favors for guests at weddings, bridal showers, or baby showers.
- Thank You Gifts: Show appreciation to friends, teachers, or coworkers with a thoughtful gift of homemade candy.
2. Packaging Ideas
The presentation of your swedish candy can enhance the gifting experience. Here are some creative packaging ideas:
- Decorative Jars: Fill glass jars with your homemade candy and decorate them with ribbons, labels, or tags. This not only looks beautiful but also allows the recipient to see the treats inside.
- Gift Boxes: Use small gift boxes or tins to create a delightful assortment of different types of Swedish candy. You can line the boxes with tissue paper or cellophane for an elegant touch.
- Cellophane Bags: For a simple yet charming presentation, use clear cellophane bags tied with colorful ribbons. This is especially great for smaller candies like spiced almonds or chocolate-covered treats.
- Personalized Labels: Create custom labels for your candy packaging that include the name of the candy, ingredients, and a personal message. This adds a thoughtful touch and lets recipients know what they’re enjoying.
3. Include a Recipe Card
If you’re gifting swedish candy that you’ve made from a special recipe, consider including a recipe card with your gift. This allows the recipient to recreate the candy at home and adds a personal touch to your gift. You can also share tips or variations to inspire them to experiment with their own candy-making.
4. Create a Candy Gift Basket
For a more elaborate gift, consider assembling a candy gift basket filled with a variety of homemade swedish candy. Include different types of treats, such as chocolate-covered candies, spiced almonds, and fluffy marshmallows. You can also add complementary items like hot cocoa mix, tea, or coffee to create a delightful experience. Arrange the items in a decorative basket and wrap it in cellophane for a beautiful presentation.
5. Share with the Community
Don’t forget to share your homemade swedish candy with your local community! Consider donating your treats to local charities, schools, or community events. Homemade candy can brighten someone’s day and foster a sense of community spirit. You can also host a candy-making party where friends and family can come together to create and share their own treats.
6. Be Mindful of Dietary Restrictions
When gifting swedish candy, it’s important to consider any dietary restrictions or allergies that your recipients may have. If you know someone has a nut allergy, for example, be sure to avoid using nuts in your candy recipes. You can also create sugar-free or vegan versions of your favorite candies to accommodate different dietary needs. Including a note about the ingredients can help recipients feel more comfortable enjoying your treats.
7. Enjoy the Experience Together
Sharing your homemade swedish candy can also be an opportunity to create lasting memories. Consider inviting friends or family over for a candy tasting party where everyone can sample different treats and share their favorites. This not only allows you to showcase your candy-making skills but also fosters connection and enjoyment among loved ones.
Sweet Reflections: The Joy of Swedish Candy
As we conclude our exploration of swedish candy, it’s clear that these delightful treats are more than just sweets; they are a celebration of culture, tradition, and creativity. From the rich history of polkagris to the indulgent flavors of chocolate fudge, swedish candy offers a unique experience that captivates the taste buds and warms the heart.
The process of making swedish candy at home not only allows you to enjoy these delicious treats but also connects you to the rich culinary heritage of Sweden. By using quality ingredients and mastering essential techniques, you can create authentic swedish candy that reflects your personal touch. Whether you’re crafting chewy licorice, refreshing peppermint candies, or decadent fudge, each creation is a testament to the joy of candy making.
Sharing swedish candy with friends and family enhances the experience, turning simple treats into cherished memories. Whether it’s during festive celebrations, casual gatherings, or quiet moments of indulgence, swedish candy brings people together, fostering connections and creating lasting bonds. The act of gifting homemade sweets or organizing candy exchanges adds a layer of warmth and thoughtfulness that enriches relationships.
Moreover, the versatility of swedish candy allows for endless creativity. Experimenting with flavors, textures, and presentations can transform your candy-making endeavors into a delightful adventure. From vibrant candy buffets to themed gift boxes, the possibilities are as limitless as your imagination.
In essence, swedish candy is not just about satisfying a sweet tooth; it’s about embracing a culture, celebrating traditions, and sharing joy with others. So, whether you’re enjoying a piece of chocolate fudge during a cozy fika or gifting a box of homemade treats to a loved one, remember that each bite of swedish candy is a celebration of sweetness and connection.
As you embark on your own swedish candy journey, may you find joy in the process, delight in the flavors, and create sweet memories that last a lifetime. So go ahead, indulge in the world of swedish candy, and let the sweetness inspire you to share and celebrate life’s special moments!
7 thoughts on “How to Prepare Easy Swedish Candy for Sweet Treats at Home”