
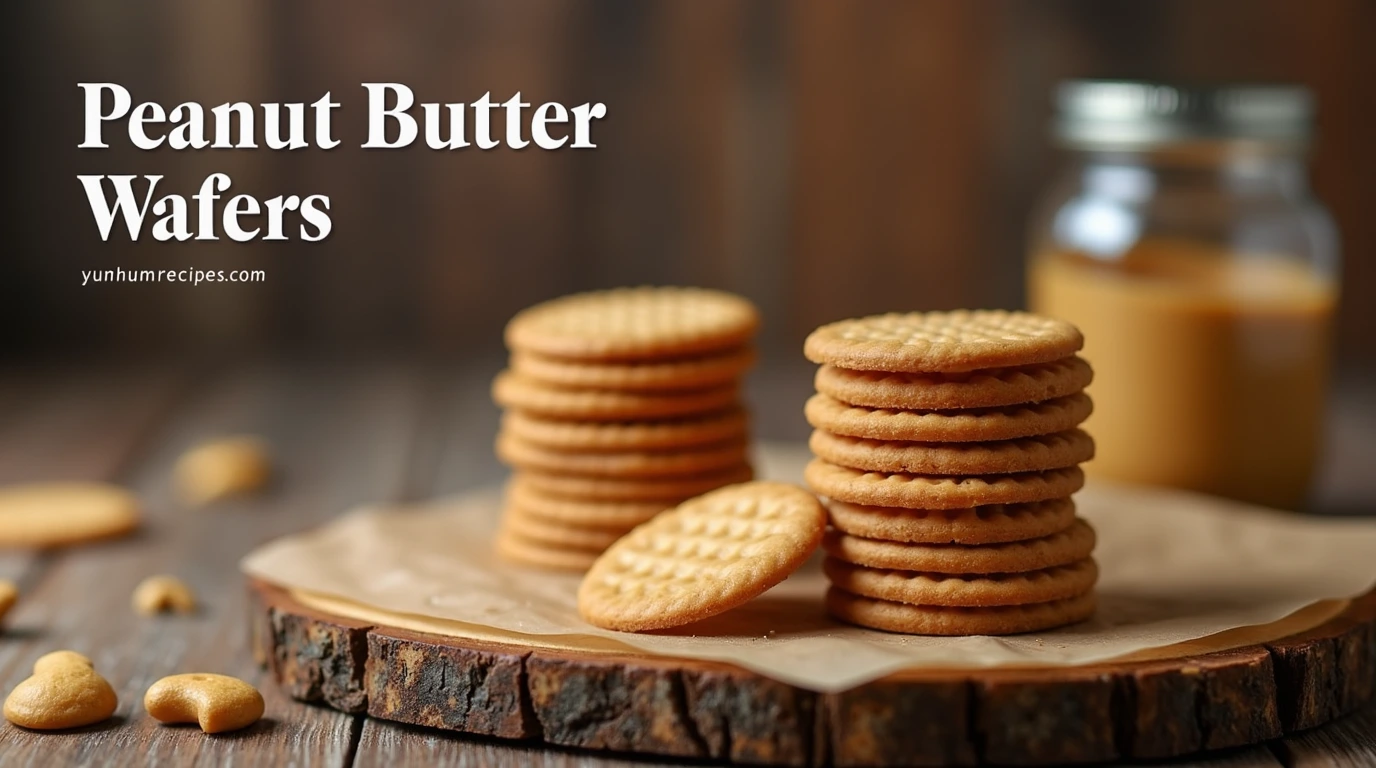
When it comes to classic snacks, few treats evoke the same sense of nostalgia and delight as peanut butter wafers. These crunchy, golden wafers, often paired with a rich and creamy peanut butter filling, have been a staple in many households for generations. Whether you enjoy them on their own as a quick snack, use them as a base for decadent desserts, or incorporate them into your favorite recipes, peanut butter wafers are a versatile and beloved treat that never goes out of style.
In this blog post, we’ll explore 6 sweet ways to enjoy peanut butter wafers, from classic recipes to creative twists and innovative ideas, so you can experience the full range of possibilities that these delicious wafers have to offer. So, get ready to indulge in the sweet and savory world of peanut butter wafers and discover why they remain a timeless favorite among snack enthusiasts and dessert lovers alike.
Table of Contents
Introduction to Peanut Butter Wafers

What are Peanut Butter Wafers?
Peanut butter wafers are a classic snack that has been a staple in many households for decades, made with peanut butter. These crunchy and delicious treats are made with a combination of peanut butter, sugar, and flour, and are often enjoyed on their own or used as an ingredient in various desserts. With their rich and nutty flavor, it’s no wonder why peanut butter wafers remain a popular choice among snack enthusiasts.
Ingredients and Composition
The ingredients used to make peanut butter wafers are relatively simple, consisting of:
- Peanut butter
- Sugar
- Flour
- Eggs
- Vanilla extract
These ingredients are combined in a specific ratio to create a dough that is then rolled out and cut into thin wafers. The wafers are then baked until crisp and golden brown, resulting in a delicious snack that is both satisfying and addictive.
Manufacturing Process
The manufacturing process for peanut butter wafers involves several steps:
- Mixing the dough ingredients together until a uniform consistency is achieved
- Rolling out the dough to a thickness of approximately 1/4 inch
- Cutting the dough into desired shapes and sizes
- Baking the wafers in a preheated oven at 350°F for 10-12 minutes
- Cooling the wafers on a wire rack before packaging and distribution
Variations and Pairings
Peanut butter wafers can be enjoyed on their own or paired with a variety of ingredients to create unique and delicious flavor combinations. For example, they can be used as a topping for ice cream or yogurt, or paired with hazelnut cream for a rich and decadent treat. They can also be crushed and used as a crust for cheesecakes or other desserts, adding a crunchy texture and nutty flavor.
Sensory Experience
The sensory experience of enjoying peanut butter wafers is a major part of their appeal. The crunchy texture and rich flavor of the wafers provide a satisfying snack experience that is both enjoyable and addictive. The aroma of peanut butter and sugar wafting from the wafers is also a major draw, making them a popular choice among snack enthusiasts.
History of Peanut Butter Wafers
The sweet, crunchy delight of peanut butter wafers has been a staple in many households for generations Shen the concept of peanut butter wafer originated. To delve deeper into the rich history of this beloved snack, we must explore its origins and evolution over time.
Early Beginnings
Peanut butter wafers have their roots in the early 20th century,phan the first commercial peanut butter products emerged. The process of creating peanut butter wafers involved:
- Roasting peanuts to enhance their flavor and aroma
- Grinding the roasted peanuts into a smooth paste
- Mixing the peanut paste with sugar and other ingredients to create a dough
- Rolling out the dough into thin sheets and cutting them into wafer shapes
Mass Production and Popularity
As technology improved, peanut butter wafers utilizing convection ovens became more widely available. Some notable characteristics of mass-produced peanut butter wafers include:
- Crunchy texture
- Sweet and nutty flavor
- Convenient packaging for on-the-go snacking
Creative Variations and Pairings
Peanut butter wafers can be paired with a variety of sweet and savory ingredients, such as:
- Chocolate chips
- Fresh fruit
- Caramel sauce
For a refreshing twist, try pairing peanut butter wafers with a Hugo Spritz, a classic Italian drink made with Prose commercially available Prosecco and soda water.
Modern Innovations
Today, peanut butter wafers are enjoyed in many forms, from classic to gourmet. Some modern variations include:
| Flavor | Description | Ingredients |
|---|---|---|
| Honey Roasted | Sweet and nutty flavor with a hint of honey | Peanut butter, honey, sea salt |
| Dark Chocolate | Rich, decadent flavor with a dark chocolate coating | Peanutswire, dark chocolate, cocoa powder |
Why are Peanut Butter Wafers a Classic Snack?
Peanut butter wafers have been a beloved snack for generations, and their enduring popularity can be attributed to their unique combination of crunchy texture and rich, nutty flavor. The perfect blend of peanut butter and wafer has made this snack a staple in many households, with its appeal transcending age and cultural boundaries.
The Perfect Blend of Texture and Flavor
The secret to the timeless appeal of peanut butter wafers lies in their masterful balance of texture and flavor. The crisp, golden wafers provide a satisfying crunch, while the smooth, creamy peanut butter filling adds a depth of flavor that is both nutty and slightly sweet. To achieve this perfect balance, manufacturers follow a precise process:
- Selecting high-quality peanut butter with a high oil content
- Using a specific type of wafer that is thin and crisp
- Applying the perfect amount of pressure to ensure a smooth and even spread of peanut butter
The Nostalgic Appeal of Peanut Butter Wafers
Peanut butter wafers evoke a strong sense of nostalgia in many people, reminiscent of childhood memories and warm, comforting afternoons spent snacking on these treats. The combination of peanut butter and wafer is a classic one, and its familiarity is a major factor in the enduring popularity of peanut butter wafers. For those looking to recreate this nostalgic experience, consider pairing peanut butter wafers with other classic ingredients, such as Baminer Pepper Jam, to create unique and delicious flavor combinations.
The Versatility of Peanut Butter Wafers
Peanut butter wafers are not just limited to being a simple snack; they can also be used as a creative ingredient in various recipes. Some ideas include:
- Using peanut butter wafers as a base for no-bake desserts
- Crushing peanut butter wafers to create a crunchy topping for salads or yogurt parfaits
- Incorporating peanut butter wafers into homemade granola or trail mix
The Timeless Appeal of Peanut Butter Wafers
The appeal of peanut butter wafers is not limited to their taste alone; their convenient packaging and long shelf life make them a popular choice for snacks on-the-go. Whether you’re looking for a quick pick-me-up or a satisfying snack to accompany your favorite beverage, peanut butter wafers are the perfect choice.
Overview of the Blog Post
Let’s delve into the world of peanut butter wafers, a classic snack that can be enjoyed in a variety of ways. This article will explore the different uses of peanut butter wafers in various desserts and snacks, providing six sweet ways to enjoy this timeless treat.
A Brief Introduction
To begin with, let’s define what constitutes a peanut butter wafer. These are delicate, crisp wafers flavored with peanut butter, a perfect combination of crunchy and flavorful. To understand the appeal of peanut butter wafers, we can look at their main ingredients, including:
- Peanut butter
- Sugar
- Flour
- Eggs
- Vanilla extract
How to Create Delicious Desserts
When creating desserts with peanut butter wafers, it’s essential to follow a few steps:
- Select a recipe that incorporates peanut butter wafers as the main ingredient.
- Choose a complementary flavor, such as chocolate or caramel.
- Prepare the dessert according to the recipe instructions.
To create a delicious dessert, consider incorporating peanut butter wafers into a recipe for peanut butter wafer cake, which involves layering wafers with creamy frosting and tasting the sweet combination of flavors. If you’re interested in learning more about baking desserts at home, consider checking out our article on how to prepare easy Swedish Candy for sweet treats.
Here’s a table comparing different types of desserts that use peanut butter wafers:
| Dessert Type | Description | Key Ingredients |
|---|---|---|
| Peanut Butter Wafer Cake | A layered cake with peanut butter wafer layers and creamy frosting | Peanut butter wafers, frosting, chocolate |
| Peanut Butter Wafer Bars | A no-bake dessert made with peanut butter wafers and chocolate | Peanut butter wafers, chocolate, peanut butter |
| Peanut Butter Wafer Ice Cream | A unique ice cream flavor that incorporates peanut butter wafers | Peanut butter wafers, ice cream base, peanut butter |
Tips and Tricks
To take your peanut butter wafer desserts to the next level, consider these tips:
- Use a high-quality peanut butter for the best flavor and texture.
- Experiment with different flavors, such as vanilla or caramel.
- Practice makes perfect, so don’t be afraid to try new recipes and techniques.
Delicious Ways to Enjoy Peanut Butter Wafers

Peanut Butter Wafer Cookies: A Classic Recipe
Indulge in the rich, velvety taste of peanut butter wafers as we delve into the art of crafting the perfect peanut butter wafer cookies. With a delicate balance of crunchy and chewy textures, these cookies are sure to satisfy your sweet tooth. In this section, we’ll explore the classic recipe for peanut butter wafer cookies, complete with tips and tricks for achieving the perfect bake.
Making the Dough
To begin, preheat your oven to 375°F (190°C). In a large mixing bowl, cream together 1 cup of peanut butter, 1/2 cup of granulated sugar, and 1/4 cup of brown sugar until smooth.
- 2 large eggs
- 1 teaspoon of vanilla extract
- 2 1/4 cups of all-purpose flour
- 1 teaspoon of baking soda
- 1/4 teaspoon of salt
Next, follow these steps:
- Gradually add the dry ingredients to the wet ingredients, mixing until a dough forms.
- Wrap the dough in plastic wrap and refrigerate for at least 30 minutes.
- Scoop tablespoon-sized balls of dough onto a baking sheet lined with parchment paper.
Baking the Cookies
Bake the cookies for 10-12 minutes, or until they’re lightly golden brown. Remove them from the oven and let them cool on the baking sheet for 5 minutes before transferring them to a wire rack to cool completely. For an added crunch, try sandwiching a peanut butter wafer between two cookies for a delightful twist.
Tips and Variations
For a unique flavor combination, try pairing your peanut butter wafer cookies with a refreshing drink, such as 3 Refreshing Blood Orange Juice Recipes for a Healthy Boost. This sweet and tangy duo is sure to please even the most discerning palates.
- Add a pinch of sea salt to balance the sweetness
- Use natural peanut butter for a richer flavor
- Experiment with different types of sugar, such as turbinado or demerara
Troubleshooting
If your cookies turn out too dense, try adding a little more flour to the dough. Conversely, if they’re too crumbly, add a bit more peanut butter. With these simple tips and tricks, you’ll be well on your way to creating the perfect peanut butter wafer cookies.
Using Peanut Butter Wafers in Desserts and Snacks
Peanut butter wafers are a versatile ingredient that can elevate various desserts and snacks, offering a crunchy texture and a rich, nutty flavor. By incorporating peanut butter wafers into your recipes, you can add a delightful twist to classic treats.
Enhancing Desserts with Peanut Butter Wafers
To create a show-stopping dessert, try using peanut butter wafers as a crust for cheesecakes or pies. Here’s a simple process to follow:
- Crush 1 1/2 cups of peanut butter wafers into fine crumbs.
- Mix the crumbs with 1/4 cup of melted butter and 1 tablespoon of granulated sugar.
- Press the mixture into a pie dish or springform pan.
- Bake at 350°F for 10-12 minutes, or until lightly browned.
Some popular dessert ideas that feature peanut butter wafers include:
- Peanut butter wafer ice cream sandwiches
- Peanut butter wafer cake with moist chocolate frosting
- Peanut butter wafer bars with a gooey caramel topping
Incorporating Peanut Butter Wafers into Snacks
Peanut butter wafers can also be used to add crunch and flavor to various snacks. For example, you can use them to make a crunchy snack mix by combining:
- 1 cup of peanut butter wafers
- 1/2 cup of salted peanuts
- 1/2 cup of dried cranberries
- 1/4 cup of melted white chocolate
Alternatively, you can use peanut butter wafers to make a delicious ice cream flavor. Check out our Classic Neapolitan Ice Cream Recipe for inspiration on how to create unique ice cream flavors.
Tips for Working with Peanut Butter Wafers
When working with peanut butter wafers, it’s essential to consider the texture and flavor you want to achieve. Here are some tips to keep in mind:
| Ingredient | Quantity | Purpose |
|---|---|---|
| Peanut butter wafers | 1 1/2 cups | Crunchy texture |
| Melted butter | 1/4 cup | Binding agent |
| Granulated sugar | 1 tablespoon | Balances flavor |
By following these tips and experimenting with different recipes, you can unlock the full potential of peanut butter wafers in your desserts and snacks.
Creative Ways to Incorporate Peanut Butter Wafers into Your Baking
Peanut butter wafers are a classic snack that can add a delicious twist to your baked goods. With their crunchy texture and nutty flavor, they can elevate your desserts from ordinary to extraordinary. Whether you’re a seasoned baker or a beginner, incorporating peanut butter wafers into your baking can be a game-changer.
Adding Texture and Flavor to Cakes and Cupcakes
To add texture and flavor to your cakes and cupcakes, try crushing peanut butter wafers and using them as a topping or mixing them into the batter. You can also use peanut butter wafers as a base for your cake, by crushing them and mixing them with melted butter and sugar to create a crust. For example:
- 1 1/2 cups crushed peanut butter wafers
- 1/4 cup melted butter
- 1/4 cup sugar
This crust can be used for cheesecakes, cream pies, or even as a base for a peanut butter wafer cake.
Making Peanut Butter Wafer Cookies and Bars
Peanut butter wafers can also be used to make delicious cookies and bars. Try using them as a base for your cookie dough, or mixing them into the batter for added texture and flavor. Here’s a simple recipe to get you started:
- Preheat your oven to 350°F (180°C).
- Mix together 2 cups of peanut butter wafer crumbs, 1 cup of sugar, and 1/2 cup of melted butter.
- Press the mixture into a baking dish and bake for 20-25 minutes.
- Let it cool and cut into bars.
Experimenting with Different Flavors and Ingredients
Don’t be afraid to experiment with different flavors and ingredients when incorporating peanut butter wafers into your baking. Try adding a pinch of sea salt or a sprinkle of cinnamon to balance out the sweetness. You can also use peanut butter wafers as a base for other desserts, like ice cream or milkshakes. For inspiration, check out our Quince Fruit: 5 Irresistible Recipes to Make at Home article, which features unique flavor combinations and ingredients.
Tips and Variations for Using Peanut Butter Wafers
When using peanut butter wafers in your baking, keep in mind that they can be quite crunchy, so you may need to adjust the baking time and temperature accordingly. You can also use different types of peanut butter wafers, such as chocolate-covered or honey-roasted, to add different flavors and textures to your desserts. Here are some quick tips to keep in mind:
- Use fresh peanut butter wafers for the best flavor and texture
- Experiment with different ratios of peanut butter wafers to other ingredients
- Don’t overmix the batter, as this can cause the peanut butter wafers to become stale
Peanut Butter Wafer Sandwich Cookies: A Twist on a Classic
Peanut butter wafers are a classic snack that can be enjoyed in various ways, and one of the most delicious ways is to use them as the base for sandwich cookies. These crunchy and chewy treats are perfect for satisfying your sweet tooth, and with the addition of peanut butter wafers, they become even more irresistible.
Introduction to Sandwich Cookies
To make peanut butter wafer sandwich cookies, you will need to start with a batch of freshly baked wafers. Here are the steps to follow:
- Preheat your oven to 375°F (190°C).
- Mix together the ingredients, including peanut butter, sugar, eggs, and flour.
- Roll out the dough and cut into desired shapes.
- Bake the wafers for 10-12 minutes, or until they are lightly browned.
Ingredients:
- 2 cups all-purpose flour
- 1 teaspoon baking soda
- 1 teaspoon salt
- 1 cup peanut butter
- 1/2 cup granulated sugar
- 1 egg
Assembling the Sandwich Cookies
Once the wafers are baked, you can start assembling the sandwich cookies. This involves spreading a layer of creamy filling, such as peanut butter and chocolate, on one of the wafers, and then topping it with another wafer. You can also add other ingredients, such as nuts and caramel, to enhance the flavor and texture.
| Filling | Description |
|---|---|
| Peanut Butter | Creamy and nutty |
| Chocolate | Rich and decadent |
| Caramel | Sweet and sticky |
Tips and Variations
To take your peanut butter wafer sandwich cookies to the next level, you can experiment with different fillings and toppings. For example, you can use Mexican Snacks: 6 Easy Recipes for a Flavorful Snack Time as inspiration and add some spicy peppers or cinnamon to the filling. You can also use different types of chocolate and nuts to create a unique flavor combination.
Troubleshooting and Storage
If you find that your sandwich cookies are too crumbly, you can try adding more peanut butter to the filling. You can also store the cookies in an airtight container to keep them fresh for a longer period.
Peanut Butter Wafer Recipes to Try at Home

Simple Peanut Butter Wafer Recipe for Beginners
Indulge in the rich, creamy flavor of peanut butter wafers, a classic snack that’s easy to make at home. With just a few simple ingredients, you can create a delicious batch of peanut butter wafers that are perfect for satisfying your cravings. In this section, we’ll explore a simple recipe for peanut butter wafers that’s perfect for beginners.
Gathering Ingredients and Equipment
To start, you’ll need to gather the following ingredients:
- 2 cups all-purpose flour
- 1 teaspoon baking soda
- 1 teaspoon salt
- 1 cup peanut butter
- 1/2 cup granulated sugar
- 1/4 cup brown sugar
- 2 large eggs
- 1 teaspoon vanilla extract
You’ll also need a few pieces of equipment, including a mixing bowl, whisk, and baking sheet.
Here’s a step-by-step guide to making the peanut butter wafers:
- Preheat your oven to 375°F (190°C).
- In a large mixing bowl, whisk together the flour, baking soda, and salt.
- In a separate bowl, cream together the peanut butter, granulated sugar, and brown sugar until smooth and creamy.
- Beat in the eggs and vanilla extract until well combined.
Mixing and Baking the Wafers
Once you’ve mixed the ingredients together, it’s time to shape the dough into wafers. You can use a cookie scoop or your hands to shape the dough into small balls, about 1 inch (2.5 cm) in diameter. Place the wafers on a baking sheet lined with parchment paper, leaving about 2 inches (5 cm) of space between each wafer.
If you’re looking for more creative snack ideas, be sure to check out our article on Jackfruit Chips: 6 Creative Ways to Enjoy This Snack.
Tips and Variations
To add some extra flavor to your peanut butter wafers, you can try adding a pinch of salt or a teaspoon of honey to the dough. You can also experiment with different types of peanut butter, such as natural or honey roasted, to change up the flavor.
Here are some quick tips for making the perfect peanut butter wafers:
- Use high-quality peanut butter for the best flavor
- Don’t overmix the dough, or the wafers may become tough
- Bake the wafers until they’re lightly golden brown and crispy
Peanut Butter Wafer Cake: A Moist and Delicious Dessert
Indulge in the rich flavors of peanut butter and the crunch of wafers in a decadent dessert that will satisfy your cravings. Imagine a moist cake filled with the aroma of roasted peanuts and the taste of creamy peanut butter, all wrapped up in a bundle of crispy wafers. This peanut butter wafer cake is a game-changer for any dessert lover, and we’re about to dive into the world of baking to create this masterpiece.
Making the Cake
To start, preheat your oven to 350°F (175°C) and prepare a 9×13 inch baking dish. The cake recipe requires:
- 2 cups of all-purpose flour
- 1 cup of granulated sugar
- 1/2 cup of unsalted butter, softened
- 2 large eggs
- 2 teaspoons of vanilla extract
- 1 cup of peanut butter
Combine these ingredients in a large mixing bowl and mix until a smooth batter forms. The key to a moist cake is to not overmix, so be gentle when folding in the ingredients.
Adding the Wafers
The wafers add a delightful textural contrast to the cake. To incorporate them, you’ll need:
- 1 cup of crushed peanut butter wafers
- 1/4 cup of granulated sugar
- 1/4 cup of melted butter
Mix these ingredients in a separate bowl until the wafers are evenly coated. Then, fold them into the cake batter to create a marbled effect.
Assembling the Cake
To assemble the cake, follow these steps:
- Pour half of the cake batter into the prepared baking dish.
- Top with a layer of peanut butter wafer crumbs.
- Pour the remaining cake batter over the crumbs.
- Bake for 35-40 minutes, or until a toothpick comes out clean.
For more baking tips and tricks, check out our article on Strawberry Shortcake Ice Cream: Top 7 Tips for Perfecting It.
Tips and Variations
| Ingredient | Variation |
|---|---|
| Peanut butter | Almond butter or cashew butter for a different flavor |
| Wafers | Chocolate sandwich cookies for a chocolate-peanut butter combination |
Experiment with different combinations to create unique flavor profiles. Remember, the key to a great cake is to have fun and be creative with your ingredients.
Peanut Butter Wafer Bars: A No-Bake Treat
Indulge in the creamy richness of peanut butter and the crunch of wafers, combined in a no-bake treat that’s perfect for any time of the year. Peanut butter wafer bars are a delightful twist on traditional desserts, offering a unique texture and flavor profile that’s sure to please even the most discerning palates.
Making the Perfect Peanut Butter Wafer Bars
To create these scrumptious bars, you’ll need to combine peanut butter, condensed milk, and wafer crumbs in a specific ratio. Here’s a step-by-step guide to get you started:
- Prepare the wafer crust by crushing 2 cups of peanut butter wafers and mixing them with 1/4 cup of melted butter.
- Press the mixture into a lined baking dish and refrigerate for at least 30 minutes.
- In a separate bowl, combine 1 cup of peanut butter, 1 cup of condensed milk, and 1 teaspoon of vanilla extract.
Tips for Customizing Your Peanut Butter Wafer Bars
You can customize your peanut butter wafer bars to suit your taste preferences by adding different ingredients, such as:
- Chopped nuts for added crunch
- Dried fruits for a sweet and chewy texture
- Cocoa powder for a chocolatey twist
For inspiration, you can also check out our article on Popcorn Chips: 5 Quick and Easy Recipes to Try Today, which features a variety of unique flavor combinations that can be applied to your peanut butter wafer bars.
Troubleshooting Common Issues
When making peanut butter wafer bars, you may encounter some common issues, such as:
| Issue | Solution |
|---|---|
| Too crumbly | Add more condensed milk to bind the mixture |
| Too sticky | Add more wafer crumbs to absorb excess moisture |
By following these tips and troubleshooting advice, you’ll be able to create perfect peanut butter wafer bars every time.
Enjoying Your Delicious Creation
Once your peanut butter wafer bars are set, you can enjoy them as a sweet treat or use them as a base for other desserts. The peanut butter flavor pairs well with a variety of ingredients, from fresh fruits to caramel sauce. Experiment with different combinations to find your favorite way to enjoy these delicious bars.
Peanut Butter Wafer Ice Cream: A Unique and Creamy Flavor
Imagine a scoop of creamy ice cream infused with the rich, nutty flavor of peanut butter and the crunch of peanut butter wafers. This unique dessert combination is sure to tantalize your taste buds and leave you craving for more. The primary keyword, peanut butter wafers, is the star of this show, and we’re about to dive into the world of peanut butter wafer ice cream.
Making the Ice Cream Base
To create this delicious dessert, you’ll need to start by making the ice cream base. This involves combining 2 cups of heavy cream, 1 cup of whole milk, and 1/2 cup of granulated sugar in a medium saucepan. Heat the mixture over medium heat, stirring occasionally, until the sugar has dissolved and the mixture is hot but not boiling.
- Remove the mixture from the heat and let it cool to room temperature.
- Cover the mixture and refrigerate it for at least 2 hours or overnight.
- Once the mixture is chilled, pour it into an ice cream maker and churn according to the manufacturer’s instructions.
Adding the Peanut Butter Wafer Flavor
Once the ice cream is almost fully churned, it’s time to add the peanut butter wafer flavor. You can do this by folding in 1/2 cup of crushed peanut butter wafers and 2 tablespoons of creamy peanut butter into the ice cream.
- 1/2 cup crushed peanut butter wafers
- 2 tablespoons creamy peanut butter
- 1 teaspoon vanilla extract
You can also add some caramel sauce or chocolate chips to enhance the flavor. For example, if you’re looking for a smoky flavor, you could try using apple smoked bacon to make a caramel sauce.
Tips and Variations
To take your peanut butter wafer ice cream to the next level, consider adding some mix-ins like chopped nuts or candy pieces. You could also try using different types of milk, such as almond or soy milk, to create a non-dairy version of the ice cream.
| Mix-in | Quantity |
|---|---|
| Chopped peanuts | 1/2 cup |
| Chocolate chips | 1 cup |
| Caramel sauce | 1/4 cup |
Serving and Enjoying
Now that you’ve made your peanut butter wafer ice cream, it’s time to enjoy it! Scoop the ice cream into a bowl and top it with some additional crushed peanut butter wafers, whipped cream, or a drizzle of caramel sauce. With its unique flavor and creamy texture, this ice cream is sure to be a hit with anyone who tries it.
Tips and Variations for Making Peanut Butter Wafers

Choosing the Right Peanut Butter for Your Wafers
When it comes to making delicious peanut butter wafers, the type of peanut butter you use can make all the difference. With so many options available, from creamy to crunchy, it can be overwhelming to decide which one to choose. But fear not, dear bakers, for we’re about to dive into the world of peanut butter and explore the best options for your wafers.
Choosing the Right Consistency
The consistency of your peanut butter is crucial when making wafers. You want a peanut butter that’s smooth and creamy, but not too runny. Natural peanut butter can be a great option, but it can be quite oily, which can affect the texture of your wafers. On the other hand, processed peanut butter can be too thick and sticky. Here are some tips to help you choose the right consistency:
- Look for a peanut butter with a smooth and creamy texture
- Avoid peanut butters with added oils or sugars
- Choose a peanut butter with a high peanut content for the best flavor
Understanding Peanut Butter Types
There are several types of peanut butter available, each with its own unique characteristics. Here are a few options to consider:
- Creamy peanut butter: Smooth and creamy, this type of peanut butter is perfect for making wafers.
- Crunchy peanut butter: With its chunky texture, this type of peanut butter is great for adding a bit of crunch to your wafers.
- Old-fashioned peanut butter: This type of peanut butter has a coarser texture and a more robust flavor.
Tips for Working with Peanut Butter
When working with peanut butter, it’s essential to understand how to handle it properly. Here are a few tips to keep in mind:
| Temperature | Consistency |
|---|---|
| Room temperature | Soft and creamy |
| Refrigerated | Thick and sticky |
| Heated | Runny and oily |
As you can see, the temperature of your peanut butter can greatly affect its consistency. Make sure to store your peanut butter at room temperature for the best results.
If you’re looking for more recipe ideas, be sure to check out our article on Top 5 Easy Protein Chips Recipes, which features a delicious peanut butter-based snack.
Troubleshooting Common Issues
If you’re experiencing issues with your peanut butter wafers, such as a too-crunchy or too-soft texture, it may be due to the type of peanut butter you’re using. Here are a few troubleshooting tips:
- If your wafers are too crunchy, try using a creamy peanut butter instead of a crunchy one.
- If your wafers are too soft, try using a peanut butter with a higher peanut content.
Adding Different Ingredients to Enhance Flavor
The world of peanut butter wafers is a versatile one, where the addition of different ingredients can elevate the flavor and texture to new heights. By introducing new elements, you can create unique variations that will tantalize your taste buds and leave you wanting more.
Introduction to Flavor Enhancement
To start enhancing the flavor of your peanut butter wafers, consider adding a pinch of sea salt to balance out the sweetness. You can also try incorporating honey or maple syrup to add a touch of warmth and depth. For a more intense flavor, add a teaspoon of vanilla extract or a handful of chopped nuts to the mixture.
- Use high-quality ingredients to ensure the best flavor
- Experiment with different combinations to find your perfect match
- Don’t be afraid to try new and unusual ingredients
Advanced Flavor Combinations
For more advanced flavor combinations, try adding a layer of cream cheese to your peanut butter wafers. This can be achieved by spreading a thin layer of cream cheese on top of the wafer before adding your favorite toppings. For inspiration, check out our article on Cream Cheese Creations: 6 Easy Recipes to Wow Your Guests for more ideas on how to incorporate cream cheese into your baking.
- Mix the cream cheese with powdered sugar and vanilla extract for a sweet and tangy flavor
- Add a sprinkle of cinnamon or nutmeg to give it a warm and spicy flavor
- Use a variety of jams or preserves to add a fruity and sweet flavor
Troubleshooting and Tips
When adding new ingredients to your peanut butter wafers, it’s essential to consider the potential effects on the texture and consistency. If you find that your wafers are becoming too soft or too hard, try adjusting the ratio of ingredients or the baking time. For example, if you’re adding a lot of honey, you may need to reduce the amount of sugar in the recipe to avoid an overly sweet flavor.
| Ingredient | Effect on Texture | Effect on Flavor |
|---|---|---|
| Honey | Softens the wafers | Adds a warm and sweet flavor |
| Chopped nuts | Adds crunch and texture | Enhances the nutty flavor |
| Sea salt | Balances the sweetness | Adds a touch of savory flavor |
Decorating Peanut Butter Wafers for Special Occasions
Peanut butter wafers are a classic snack that can be elevated to a whole new level with creative decorations, making them perfect for special occasions. Whether you’re hosting a birthday party or just want to add a personal touch to your baked goods, decorating peanut butter wafers is a great way to express your creativity and make your treats stand out.
Choosing the Right Decorations
When it comes to decorating peanut butter wafers, the possibilities are endless. You can use icing, sprinkles, or even chocolate chips to create unique and delicious designs. Here are some tips to get you started:
- Use a variety of colors to match your occasion
- Experiment with different pipings and techniques
- Add some edible glitter for extra sparkle
For a more intricate design, you can follow these steps:
- Prepare your peanut butter wafers by baking them according to your recipe
- Allow them to cool completely before decorating
- Use a piping bag to create borders, patterns, or messages
- Add your chosen decorations, such as sprinkles or chocolate chips
Adding a Personal Touch
To make your peanut butter wafers truly special, consider adding a personal touch. You can use custom molds or stencils to create unique shapes and designs. For example, you can make peanut butter wafer sandwich cookies with a special message or logo. If you’re looking for more ideas, check out our Simple Strawberry Waffles Recipe for inspiration on how to add a personal touch to your baked goods.
Tips and Tricks
When decorating peanut butter wafers, it’s essential to have the right tools and ingredients. Make sure you have a steady hand and a good quality piping bag to achieve smooth and consistent lines. You can also experiment with different flavor combinations, such as pairing peanut butter with vanilla or chocolate. Here are some quick tips to keep in mind:
- Use a turntable to display your decorated peanut butter wafers
- Store your decorated treats in an airtight container to keep them fresh
- Practice makes perfect, so don’t be discouraged if your first attempts don’t turn out as expected
Storage and Freshness Tips for Homemade Peanut Butter Wafers
Peanut butter wafers, with their crunchy texture and nutty flavor, are a delight to bake and share. However, to maintain their freshness and quality, proper storage is essential. In this section, we’ll explore the best ways to store your homemade peanut butter wafers, ensuring they remain fresh and delicious for a longer period.
Cooling and Short-Term Storage
After baking, it’s crucial to cool your peanut butter wafers completely on a wire rack to prevent sogginess. Once cooled, you can store them in an airtight container at room temperature for up to 3 days. Here are some tips for short-term storage:
- Store in a cool, dry place
- Keep away from direct sunlight
- Use a container with a tight-fitting lid
Long-Term Storage and Freezing
For longer storage, you can freeze your peanut butter wafers for up to 2 months. To freeze, follow these steps:
- Place the wafers in a single layer on a baking sheet
- Put the baking sheet in the freezer until the wafers are frozen solid
- Transfer the frozen wafers to an airtight container or freezer bag
If you’re looking for more ideas on freezing and storing baked goods, check out our article on Mini Bagels: 7 Creative Ways to Enjoy These Tiny Treats.
Troubleshooting and Tips
To maintain the freshness of your peanut butter wafers, it’s essential to monitor their texture and appearance. If you notice any softness or staleness, it’s best to consume them immediately or freeze them for later use. Here are some additional tips:
- Use fresh ingredients to ensure the best flavor and texture
- Avoid overbaking, as this can lead to dryness
- Experiment with different flavor combinations to keep your peanut butter wafers interesting
Conclusion and Final Thoughts on Peanut Butter Wafers

Recap of the 6 Sweet Ways to Enjoy Peanut Butter Wafers
As we conclude our journey through the world of peanut butter wafers, it’s clear that these crispy, golden treats offer a versatility that’s hard to resist. With their rich, nutty flavor and satisfying crunch, it’s no wonder peanut butter wafers have become a staple in many households.
Exploring the Basics of Peanut Butter Wafers
To truly appreciate the potential of peanut butter wafers, it’s essential to understand the basics of their composition. Typically made from a combination of peanut butter, sugar, and flour, these wafers can be customized to suit various tastes and preferences. For example, adding a pinch of sea salt or a drizzle of honey can elevate the flavor profile and create a truly unique experience.
- Key ingredients:
- 2 cups peanut butter
- 1 cup granulated sugar
- 1/2 cup all-purpose flour
Optional additives:
- Sea salt
- Honey
- Chopped nuts
Creative Applications for Peanut Butter Wafers
One of the most exciting aspects of working with peanut butter wafers is their potential for creative application. Whether you’re using them as a base for ice cream sandwiches or crushing them into a crunchy topping for salads, the possibilities are endless. For inspiration, consider exploring other sweet treats, such as Zebra Cakes: 7 Delicious Ways to Enjoy This Sweet Dessert, which offer a similar blend of crunch and flavor.
Tips for Working with Peanut Butter Wafers
When working with peanut butter wafers, it’s essential to consider the texture and consistency of the final product. To achieve the perfect balance of crunch and chew, follow these steps:
- Select the right peanut butter: Choose a high-quality peanut butter with a smooth, creamy texture.
- Adjust the sugar content: Balance the sweetness level to your taste by adding more or less granulated sugar.
- Experiment with additives: Introduce new flavors and textures by incorporating ingredients like chocolate chips or dried fruit.
Troubleshooting Common Issues
Despite their ease of use, peanut butter wafers can sometimes present challenges. If you find that your wafers are too crunchy or too soft, try adjusting the baking time or temperature. For more detailed guidance, consider consulting a reliable recipe source or seeking advice from an experienced baker.
Encouragement to Get Creative with Peanut Butter Wafers
Peanut butter wafers are a delightful treat that can be enjoyed in many ways, from a simple snack to a decadent dessert. With their crunchy texture and nutty flavor, it’s no wonder why peanut butter wafers are a beloved classic.
The possibilities are endless when it comes to getting creative with peanut butter wafers. One idea is to use them as a base for a tasty ice cream sundae. Here are some steps to follow:
- Start with a few peanut butter wafers as the base.
- Add a scoop of your favorite ice cream.
- Top with whipped cream, chocolate sauce, and a sprinkle of chopped nuts.
You can also use peanut butter wafers to make a crunchy crust for a cheesecake or a tart.
Experimenting with Flavors
To take your peanut butter wafers to the next level, try experimenting with different flavors. You can add a pinch of salt to balance out the sweetness, or a drizzle of honey for a touch of warmth. You can also try using different types of peanut butter, such as natural or old-fashioned, to change up the flavor.
Some other ingredients you can try adding to your peanut butter wafers include:
- Chocolate chips for a sweet and indulgent treat
- Dried fruit for a chewy and fruity twist
- Nuts forùa crunchy and satisfying snack
You can also check out our article on Cookie Monster Ice Cream: 10 Creative Ways to Enjoy It for more inspiration on how to get creative with your desserts.
Tips and Tricks
When working with peanut butter wafers, there are a few tips and tricks to keep in mind. First, make sure to store them in an airtight container to keep them fresh. You can also try freezing them for up to 3 months to keep them for a longer period. Additionally, if you find that your peanut butter wafers are becoming stale, try reviving them by placing them in a low-temperature oven for a few minutes.
| Storage Method | Shelf Life |
|---|---|
| Airtight Container | 2 weeks |
| Freezer | 3 months |
| Room Temperature | 1 week |
Final Thoughts on the Timeless Appeal of Peanut Butter Wafers
The allure of peanut butter wafers lies in their simplicity, with the perfect balance of crunchy texture and rich, nutty flavor. As we explore the world of baking and cooking, it’s clear that these classic treats have stood the test of time, remaining a staple in many households.
The Art of Combining Flavors
When it comes to peanut butter wafers, the key to success lies in combining flavors effectively. Here are some tips to get you started:
- Choose a high-quality peanut butter with a smooth consistency for the best results
- Experiment with different types of sugar, such as brown sugar or honey, to add depth to your wafers
- Don’t be afraid to add a pinch of salt to balance out the sweetness
To take your peanut butter wafers to the next level, consider incorporating other ingredients, such as:
- Chocolate chips for a sweet and indulgent treat
- Nuts or seeds for added texture and crunch
- Dried fruit for a burst of sweetness and flavor
Exploring New Recipes
If you’re looking to venture beyond the world of peanut butter wafers, why not try your hand at making gluten-free pasta? With a few simple ingredients and some practice, you can create delicious and authentic Italian dishes that are perfect for any occasion.
The Importance of Technique
Here are the steps to follow for achieving the perfect peanut butter wafer texture:
- Preheat your oven to the correct temperature to ensure even baking
- Mix your ingredients carefully to avoid overworking the dough
- Bake for the right amount of time to achieve a crispy exterior and a chewy interior
| Ingredient | Quantity | Description |
|---|---|---|
| Peanut butter | 1 cup | Creamy peanut butter for the best results |
| Sugar | 1/2 cup | Granulated sugar for a sweet and crunchy texture |
| Eggs | 1 | Large egg for binding and moisture |
Troubleshooting Common Issues
If your peanut butter wafers are turning out too crunchy or too chewy, don’t worry! Here are some common issues and how to fix them:
- Overmixing the dough can lead to tough wafers; try mixing your ingredients just until they come together
- Underbaking can result in wafers that are too soft; try baking for a few minutes longer to achieve the perfect texture
In conclusion, the timeless appeal of peanut butter wafers lies in their simplicity and versatility. With a few simple ingredients and some practice, you can create delicious treats that are perfect for any occasion. So why not get baking and see what amazing creations you can come up with?
Call to Action: Share Your Favorite Peanut Butter Wafer Recipes and Ideas
The world of peanut butter wafers is a deliciously diverse one, full of creative possibilities and mouth-watering flavors. Whether you’re a seasoned baker or a culinary newcomer, there’s always room to experimentaar with this classic snack.
Sharing is Caring
To get started, think about the ways you can use peanut butter wafers as a base for your creations. You can use them to make:
- Crunchy cookie sandwiches
- Decadent dessert bars
- Delicious ice cream toppings
- And many more!
Consider visiting our friends at Mini Corn Tortillas: Top 7 Easy Recipes for Party Appetizers for some inspiration on how to create the perfect snack.
Experiment with Flavors
When experimenting with peanut butter wafer recipes, don’t be afraid to try new flavor combinations. Here are a few ideas to get you started:
- Peanut butter and jelly: A classic combination that is easy to make and always a crowd-pleaser.
- Chocolate and peanut butter: A match made in heaven that is sure to satisfy any sweet tooth.
- Caramel and sea salt: A sweet and salty combination that adds a touch of sophistication to this classic snack.
Troubassistantleshooting
If you’re having trouble getting your peanut butter wafers to turn out right, don’t worry! Here are a few common issues and their solutions:
| Problem | Solution |
|---|---|
| Wafers too crunchy | Try baking for a shorter amount of time |
| Wafers too chewy | Try baking for a longer amount of time |
| Wafers too fragile | Try adding more peanut butter to the dough |
Get Creative
The most important thing is to have fun and be creative with your peanut butter wafer recipes. Don’t be afraid to try new things and experiment with different flavors and ingredients. And don’t forget to share your creations with us! We’d love to see what you come up with. So go ahead, get baking, and show us your favorite peanut butter wafer recipes and ideas!
2 thoughts on “Peanut Butter Wafers: 6 Sweet Ways to Enjoy This Classic”