
Imagine sinking your teeth into a soft, fluffy, and delicately crusted bread that’s steeped in tradition and flavor. This classic Austrian bread has been a staple in European bakeries for centuries, and its popularity has spread globally due to its irresistible taste and versatility.
Whether you’re a bread enthusiast, a foodie, or simply someone who appreciates the joy of freshly baked goods, learning how to make a Kaiser roll at home can be a truly rewarding experience. With its distinctive crown-shaped design and tender interior, it is perfect for serving as a side to your favorite meals, using as a base for sandwiches, or simply enjoying on its own with a pat of butter or a sprinkle of salt.
In this blog post, we’ll delve into the world of these rolls, exploring their rich history, the essential ingredients and equipment needed to make them, and a step-by-step guide to crafting the perfect recipe in the comfort of your own kitchen. So, let’s get started on this culinary journey and discover the secrets to making delicious, homemade Kaiser rolls that will impress your family and friends.
Table of Contents
Introduction to Kaiser Rolls

What is a Kaiser Roll
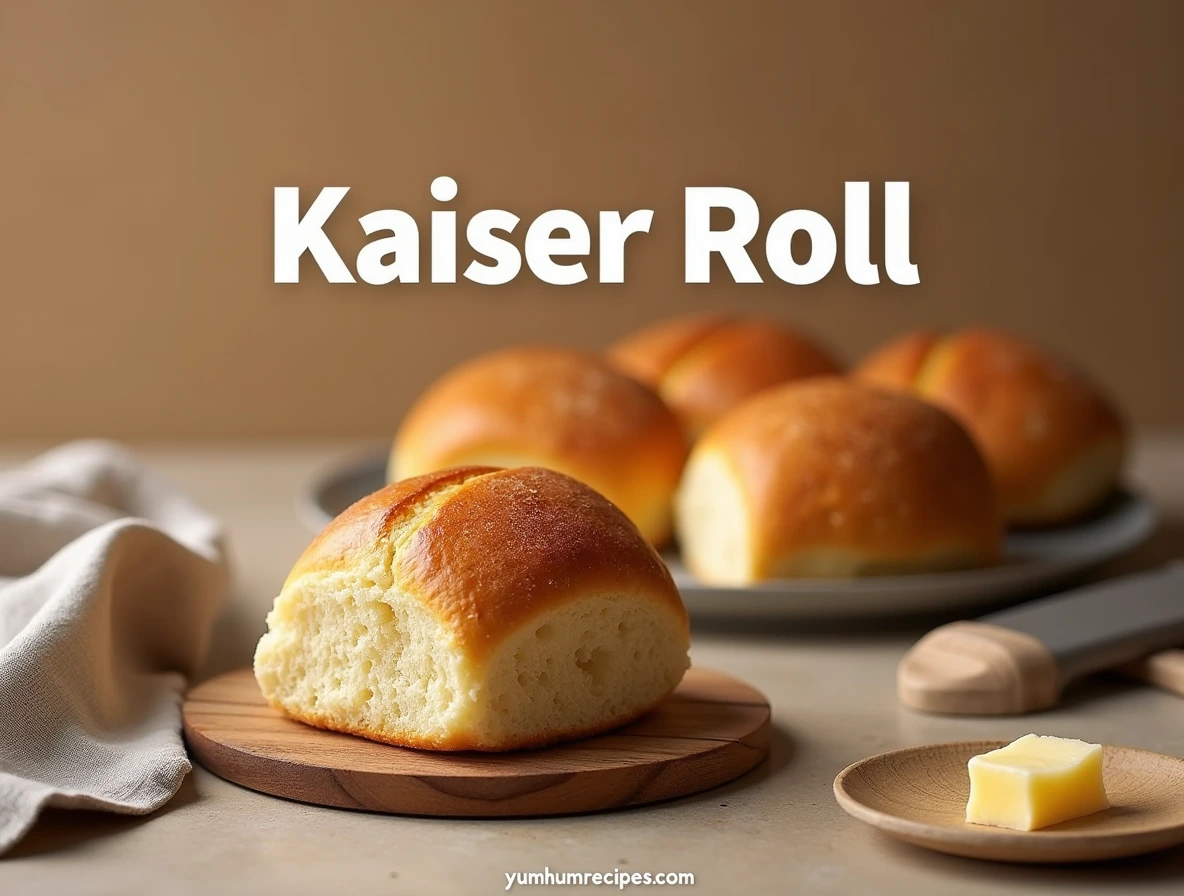
The fluffy and soft texture of a freshly baked Kaiser roll is a culinary delight that has captured the hearts of many bread enthusiasts. A Kaiser roll, also known as a Vienna roll, is a type of bread that originated in Austria and is characterized by its distinctive crust and crumb.
Introduction to Kaiser Roll Characteristics
The Kaiser roll is made from a yeast-based dough that is allowed to rise and proof before being baked to perfection. The resulting bread has a golden-brown crust and a light and airy interior. To achieve this, bakers follow a series of steps:
- Mixing the dough ingredients, including flour, water, salt, and sugar.
- Kneading the dough to develop the gluten.
- Allowing the dough to ferment and rise.
- Shaping the dough into its characteristic crown shape.
Understanding the Ingredients
The ingredients used to make a Kaiser roll are simple, yet crucial to its success. The basic ingredients include:
- Flour: provides structure and texture
- Water: hydrates the dough
- Salt: enhances flavor
- Sugar: feeds the yeast
- Yeast: responsible for fermentation
For those with dietary restrictions, it’s possible to experiment with alternative ingredients, such as gluten-free flours. For more information on gluten-free baking, check out our guide on How to Make Delicious Gluten Free Pasta.
Exploring Variations and Regional Influences
Kaiser rolls can be found in various forms and flavors, depending on the region and personal preferences. Some common variations include:
| Type | Description |
|---|---|
| Classic | Traditional Austrian-style Kaiser roll |
| Whole Wheat | Made with whole wheat flour for a nuttier flavor |
| Sesame | Topped with sesame seeds for added texture and flavor |
| Each variation offers a unique twist on the classic recipe, allowing bakers to experiment and find their favorite. |
Mastering the Baking Process
To achieve the perfect version of this bread, it’s essential to master the baking process. This involves:
- Preheating the oven to the correct temperature (around 400°F).
- Baking the rolls for the right amount of time (usually 15-20 minutes).
- Allowing them to cool before serving.
By following these steps and practicing patience, bakers can produce delicious Kaiser rolls that are sure to impress.
History of Kaiser Rolls
The flaky, golden-brown crust and soft interior of a perfectly baked Kaiser roll are a testament to the rich history of this beloved bread. With roots in 19th-century Austria, the Kaiser roll has evolved over time, influenced by various cultural and culinary traditions.
Origins in Austria
The Kaiser roll originated in Austria, where it was known as the “Kaisersemmel“. This crusty bread was a staple in Austrian bakeries, often served as a side to traditional dishes like goulash and schnitzel. The recipe typically included ingredients like strong flour, yeast, salt, and water, which were mixed and kneaded to create a smooth dough.
- Mix the ingredients together to form a shaggy dough.
- Knead the dough for 10 minutes to develop the gluten.
- Allow the dough to rise for 1 hour, or until it has doubled in size.
The resulting bread was crusty on the outside and soft on the inside, with a slightly sweet flavor.
Evolution and Adaptation
As Austrian immigrants traveled to other parts of the world, they brought their traditional baking techniques with them. In the United States, the Kaiser roll became a popular bread in many European-style bakeries. To make a delicious Kaiser roll, you’ll need:
- Strong flour
- Yeast
- Salt
- Water
- Sugar
You can also try adding different ingredients to create unique flavor combinations, such as sesame seeds or poppy seeds.
Cultural Significance
The Kaiser roll has become an integral part of many cultural traditions. In Austria, it’s often served as a side to hearty soups and stews. In the United States, it’s a popular bread for sandwiches and snacks. If you’re looking for more recipe ideas, be sure to check out our article on 10 Delicious Recipes Featuring Vanilla Bean Paste, which includes a variety of sweet and savory dishes.
Modern Variations
Today, you can find Kaiser rolls in many different shapes and sizes. Some bakeries offer whole wheat or rye variations, while others add nuts or seeds for extra texture and flavor. The key to making a great Kaiser roll is to use high-quality ingredients and to pay attention to the temperature and timing of the baking process.
| Ingredient | Quantity |
|---|---|
| Strong flour | 2 cups |
| Yeast | 1 teaspoon |
| Salt | 1 teaspoon |
| Water | 1 cup |
Importance of Kaiser Rolls in Austrian Cuisine
The flaky crust and soft interior of a freshly baked Kaiser roll are a staple in Austrian cuisine, evoking feelings of warmth and comfort. The Kaiser roll, with its rich history and cultural significance, is an integral part of Austrian bakeries and households, often served as a side to hearty meals or used as a base for various sandwiches.
Cultural Significance
Austrian cuisine is known for its hearty and wholesome dishes, and the Kaiser roll is no exception. It’s a symbol of Austrian hospitality, often served to guests as a sign of welcome and respect. The roll’s crispy crust and airy interior make it a perfect accompaniment to a variety of dishes, from soups to stews. Here are some key characteristics of a traditional Austrian Kaiser roll:
- High-quality flour
- Yeast-based dough
- Long proofing time
- Stone-baked crust
Ingredients and Preparation
The preparation of a Kaiser roll is an art that requires patience and skill. The dough must be kneaded and proofed for several hours to develop the complex flavors and * textures*. The ingredients used are simple, yet essential:
| Ingredient | Quantity |
|---|---|
| Flour | 500g |
| Yeast | 10g |
| Salt | 10g |
| Sugar | 20g |
| Water | 350ml |
| The dough is then shaped into its characteristic crescent shape and baked to perfection. |
Variations and Modern Twists
While traditional Kaiser rolls are still widely popular, modern bakeries have introduced various flavor combinations and ingredients to cater to changing tastes. Some popular variations include:
- Whole wheat Kaiser rolls
- Sesame seed Kaiser rolls
- Cheese-filled Kaiser rolls
For those looking to experiment with new flavors, visit our recipe page for crunchy hot chips for inspiration on how to incorporate different seasonings and ingredients into your baking.
Regional Specialties
Different regions in Austria have their own unique take on the Kaiser roll, with varying ingredients and preparation methods. Some regional specialties include:
- Viennese Kaiser rolls: known for their light and airy texture
- Tyrolean Kaiser rolls: made with whole wheat flour and caraway seeds
- Salzburg Kaiser rolls: topped with sesame seeds and poppy seeds
Brief Overview of the Recipe
The art of crafting a delicious Kaiser roll begins with a deep understanding of the recipe and its intricacies. With its soft, fluffy interior and crispy, golden crust, this Austrian bread has captured the hearts of many. As we delve into the world of Kaiser roll baking, you’ll discover the perfect blend of ingredients, techniques, and patience required to create these mouthwatering treats.
Understanding the Ingredients
To start, it’s essential to gather the necessary ingredients, including high-quality flour, yeast, salt, and sugar. The type of flour used can significantly impact the final product, with bread flour being the preferred choice due to its high protein content. Here are some key ingredients to keep in mind:
- 2 cups of bread flour
- 1 teaspoon of active dry yeast
- 1 teaspoon of salt
- 1 tablespoon of sugar
When combined, these ingredients will form the foundation of your Kaiser roll dough.
The Importance of Temperature and Time
Temperature and time play crucial roles in the Kaiser roll baking process. The ideal temperature for proofing the dough is between 75°F and 80°F, with a relative humidity of 70-80%. Here’s a step-by-step guide to help you get started:
- Mix the dough ingredients together until a shaggy mass forms.
- Knead the dough for 10-15 minutes until it becomes smooth and elastic.
- Place the dough in a warm, draft-free area to proof for 1-2 hours.
By following these steps, you’ll be well on your way to creating a delicious Kaiser roll.
Exploring Variations and Tips
For those looking to experiment with new flavors, consider adding vanilla bean paste or cinnamon to the dough for a unique twist. You can also find inspiration in other recipes, such as 10 Delicious Recipes Featuring Vanilla Bean Paste You Need to Try, to elevate your Kaiser roll game. Some additional tips to keep in mind:
- Use a stand mixer to simplify the kneading process
- Try using different types of flour, such as whole wheat or rye, for a distinct flavor
- Experiment with various toppings, like sesame seeds or poppy seeds, for added texture and visual appeal
Mastering the Baking Process
The baking process is where the magic happens, and your Kaiser roll transforms into a golden-brown masterpiece. Here’s a comparison of baking temperatures and times:
| Temperature (°F) | Time (minutes) |
|---|---|
| 375 | 15-20 |
| 400 | 10-15 |
| By understanding the intricacies of the baking process, you’ll be able to achieve the perfect crust and crumb. |
Ingredients and Equipment Needed

Essential Ingredients for Kaiser Rolls
To craft the perfect Kaiser roll, it’s crucial to start with high-quality ingredients. The foundation of a delicious Kaiser roll lies in its simple yet precise combination of ingredients, which ultimately yields a soft, fluffy interior and a crispy, golden crust. With the right balance of ingredients, you’ll be well on your way to baking authentic Austrian-style Kaiser rolls.
Flour and Yeast
The primary ingredients in a Kaiser roll recipe are all-purpose flour, yeast, salt, and sugar. To begin, you’ll need:
- 2 cups of all-purpose flour
- 1 teaspoon of active dry yeast
- 1 teaspoon of salt
- 1 tablespoon of granulated sugar
These ingredients provide the structure, leavening, flavor, and food for the yeast to ferment. The type of flour used can significantly impact the final texture of the roll, with bread flour producing a chewier crumb and all-purpose flour resulting in a softer, more tender interior.
Liquid Ingredients and Temperature
When it comes to liquid ingredients, warm water and melted butter play vital roles in the dough development process. Here’s a step-by-step guide to preparing the liquid ingredients:
- In a small bowl, combine 1 cup of warm water (around 100°F to 110°F) and 1 tablespoon of sugar.
- Add 2 teaspoons of active dry yeast to the water mixture and let it sit for 5 to 10 minutes, or until the mixture becomes frothy.
- In a separate bowl, whisk together 1/4 cup of melted butter, 1 egg, and a pinch of salt.
The temperature of the liquid ingredients is critical, as it affects the yeast’s activity and the overall dough development.
Additional Ingredients and Variations
For added flavor and texture, you can incorporate various ingredients into your Kaiser roll dough, such as sesame seeds, poppy seeds, or dried herbs. If you’re looking for inspiration for other bread recipes, consider exploring 12 Delicious Navy Bean Recipes for a variety of healthy and easy meal ideas. Some Kaiser roll recipes may also call for whole wheat flour or rye flour to create a denser, more robust crumb.
Measuring and Mixing
To ensure the best results, it’s essential to accurately measure and mix the ingredients. Here are some quick tips to keep in mind:
- Always use a digital scale to measure ingredients by weight, rather than volume.
- Mix the dough gently, using a stand mixer or a wooden spoon, until the ingredients just come together in a shaggy mass.
- Avoid overmixing the dough, as this can lead to a tough, dense crumb.
Specialized Equipment for Bread Baking
Bread baking, particularly when it comes to crafting the perfect Kaiser roll, requires a combination of skill, patience, and the right tools. The Kaiser roll, with its distinctive crust and soft interior, is a testament to the importance of specialized equipment in achieving bread baking perfection.
Essentials for the Home Baker
To start baking Kaiser rolls like a pro, you’ll need a few essential pieces of equipment. These include a stand mixer with a dough hook attachment, a bench scraper for handling sticky dough, and a baking stone to achieve that perfect crust. The baking stone, in particular, is crucial as it absorbs moisture and distributes heat evenly, resulting in a crispy crust and a well-cooked interior.
When it comes to mixing and kneading, the process can be quite involved:
- Initial Mix: Combine dry ingredients and yeast in a large mixing bowl.
- Dough Formation: Gradually add liquid ingredients and mix until a shaggy dough forms.
- Kneading: Use the dough hook attachment on your stand mixer to knead the dough for about 10 minutes, until it becomes smooth and elastic.
- Proofing: Let the dough rise in a warm, draft-free place until it has doubled in size.
Some useful items to have on hand include:
- A digital thermometer to ensure your ingredients and environment are at the right temperature
- Bench flour for dusting your work surface
- A clean towel for covering your dough during proofing
Advanced Equipment for the Serious Baker
For those looking to take their Kaiser roll game to the next level, investing in a steam injector or a proofing box can make a significant difference. These tools allow for more precise control over the baking and proofing processes, resulting in a more consistent product. Additionally, a pizza peel can be handy for sliding your Kaiser rolls onto the baking stone with ease.
If you’re interested in exploring other recipes that benefit from precise temperature control, consider checking out our Protein Brownies recipe, which uses similar techniques to achieve the perfect texture.
Tips for Equipment Maintenance
To keep your equipment in top condition, regular cleaning and maintenance are key. For your stand mixer, make sure to wipe down the bowl and attachments after each use, and periodically deep clean the entire machine. Your baking stone should be cleaned with a gentle brush and water, avoiding any harsh chemicals that could affect the flavor of your Kaiser rolls.
Optional Ingredients for Customization
The art of crafting the perfect Kaiser roll lies not only in the traditional recipe but also in the creative freedom to customize. With a foundation of yeast, flour, water, salt, and sugar, you can tailor your Kaiser rolls to suit any taste or occasion, making them a versatile companion for various meals, much like the versatility found in making Chow Chow Recipe: How to Make This Delicious Southern Relish, where a single relish can elevate numerous dishes.
Customizing with Herbs and Spices
To add a personal touch to your Kaiser rolls, consider introducing herbs and spices into the dough. Rosemary and garlic can create a savory, aromatic flavor profile, perfect for accompanying soups or salads. For a more subtle approach, a pinch of sesame seeds or poppy seeds can add texture and visual appeal. Here are some options to consider:
- Dried oregano for a Mediterranean twist
- Fresh thyme for a light, refreshing taste
- Crushed black pepper for an enhanced depth of flavor
Incorporating Cheese and Nuts
For a richer, more decadent version of the Kaiser roll, incorporating cheese or nuts can be a game-changer. Grated parmesan or cheddar can add a sharp, salty flavor, while walnuts or almonds introduce a satisfying crunch. The process is straightforward:
- Prepare your cheese or nuts by grating or chopping them finely.
- Fold these ingredients into the dough during the mixing phase.
- Proceed with the recipe as instructed, adjusting baking time if necessary due to the added ingredients.
Exploring Sweet Variations
While traditionally savory, Kaiser rolls can also be crafted into sweet treats. By substituting sugar with honey or maple syrup and adding dried fruits or chocolate chips, you can create a dessert-worthy Kaiser roll. The key is balance:
| Ingredient | Quantity | Effect |
|---|---|---|
| Honey | 1-2 tbsp | Sweet, moist |
| Dried Cranberries | 1/2 cup | Sweet, fruity |
| Dark Chocolate Chips | 1/2 cup | Rich, indulgent |
If you’re looking to explore sweet variations of bread, you might also enjoy making a quick and easy banana bread to serve alongside your Kaiser rolls. This recipe requires just three ingredients and is incredibly simple to prepare. For the full recipe, visit 3 Ingredient Banana Bread: The Easiest and Most Irresistible Recipe You’ll Ever Try.
Advanced Customization Techniques
For the more adventurous bakers, advanced techniques such as laminating the dough or using a sourdough starter can elevate the Kaiser roll to new heights. These methods require patience and practice but yield a Kaiser roll with unparalleled complexity and depth. Whether you’re aiming for a light, airy texture or a robust, tangy flavor, the possibilities are endless with the right approach and ingredients.
Substitutions for Common Allergens
When baking Kaiser rolls, it’s essential to consider common allergens that may be present in the ingredients. For individuals with dietary restrictions, finding suitable substitutes can be a challenge. However, with a little creativity, you can create delicious Kaiser rolls that cater to various needs.
Gluten-Free Options
For those with gluten intolerance or sensitivity, substituting traditional flour with gluten-free alternatives is a must. Some popular options include:
- Almond flour
- Coconut flour
- Rice flour
When using these flours, it’s crucial to adjust the ratio of liquid ingredients and add xanthan gum to improve texture. Here’s a simple recipe to get you started:
- Mix 1 cup of gluten-free flour with 1/2 cup of warm water.
- Add 1/4 teaspoon of salt and 1 tablespoon of sugar.
- Knead the dough for 10 minutes and let it rise for 1 hour.
Dairy-Free Alternatives
Dairy products are a common allergen in many baked goods, including Kaiser rolls. To make a dairy-free version, you can substitute milk with:
- Almond milk
- Soy milk
- Coconut milk
These alternatives can be used in the same proportions as regular milk. For example, if a recipe calls for 1 cup of milk, you can use 1 cup of almond milk instead.
Egg Replacers
Eggs can be another common allergen in baked goods. To replace eggs in your Kaiser roll recipe, you can use:
- Flaxseed meal
- Chia seeds
- Mashed banana
These ingredients can help bind the dough together and add moisture. For instance, you can mix 1 tablespoon of flaxseed meal with 3 tablespoons of water to replace one egg.
If you’re looking for more recipe ideas, be sure to check out our Chow Chow Recipe for a delicious Southern relish that pairs perfectly with Kaiser rolls.
Step-by-Step Guide to Making Kaiser Rolls
Preparing the Dough and Initial Rise
The art of crafting a delicious Kaiser roll begins with the preparation of the dough, a process that requires patience, precision, and a gentle touch. As you embark on this journey, the aroma of yeast and flour will fill the air, teasing your senses and building anticipation for the final product.
Mixing the Ingredients
To start, combine 1 cup of warm water, 2 teaspoons of active dry yeast, and 1 tablespoon of sugar in a large mixing bowl. Let the mixture sit for 5-10 minutes, allowing the yeast to activate and foam. Next, add 3 cups of all-purpose flour, 1 teaspoon of salt, and 2 tablespoons of unsalted butter, mixing until a shaggy dough forms.
- Gradually add more flour as needed to achieve a smooth, elastic consistency.
- Knead the dough for 10 minutes, until it becomes silky and pliable.
- Form the dough into a ball and place it in a lightly oiled bowl, covering it with plastic wrap or a damp towel.
Understanding the Rise
The initial rise, also known as bulk fermentation, is a critical step in developing the Kaiser roll‘s characteristic flavor and texture. During this phase, the yeast will ferment the sugars, producing carbon dioxide and causing the dough to expand. To facilitate this process, ensure the dough is in a warm, draft-free environment, ideally at a temperature of 75°F to 80°F (24°C to 27°C).
- Monitor the dough’s progress, checking for signs of over-proofing or under-proofing.
- Gently punch down the dough once it has doubled in size, usually after 1-2 hours.
Tips for Achieving the Perfect Rise
For a more complex flavor profile, consider adding a preferment, such as a sourdough starter or biga, to your Kaiser roll recipe. This will introduce a tangy, slightly sour taste and a more chewy texture. If you’re looking for inspiration, explore our collection of Gouda Cheese Recipes and discover how to pair your freshly baked Kaiser rolls with a variety of savory dishes.
Troubleshooting Common Issues
When preparing the dough, be mindful of common pitfalls, such as overmixing or underproofing. To avoid these issues, follow the recipe carefully and keep an eye on the dough’s temperature and texture. If you encounter any problems, don’t hesitate to adjust your technique and try again.
Shaping and Proofing the Rolls
As you delve into the world of Kaiser roll baking, mastering the shaping and proofing process is crucial for achieving that perfect, soft crumb and crispy crust. With a gentle touch and a bit of patience, you’ll be able to craft Kaiser rolls that rival those found in Austrian bakeries.
Shaping the Dough
To shape the dough into Kaiser rolls, follow these steps:
- Divide the dough into 8-10 equal pieces, depending on the desired size of your rolls.
- Roll each piece into a ball and then use your thumbs to create a depression in the center, stretching the dough outwards to form a ring.
- Place the shaped rolls onto a baking sheet lined with parchment paper, leaving about 1 inch of space between each roll.
- Use a bench scraper to gently lift and transfer the rolls to the baking sheet.
- Dust the rolls with a little flour to prevent them from sticking together.
Proofing the Rolls
Proofing is a critical step in the Kaiser roll recipe, as it allows the yeast to ferment and the dough to rise. To proof the rolls:
- Place the baking sheet in a warm, draft-free area, such as a proofing cabinet or a warm corner of your kitchen.
- Cover the rolls with a clean towel or plastic wrap to maintain humidity and prevent drying out.
- Allow the rolls to proof for 1-2 hours, or until they have doubled in size.
| Temperature | Time | Result |
|---|---|---|
| 75°F – 80°F | 1 hour | Slower rise, more complex flavor |
| 80°F – 85°F | 1.5 hours | Ideal rise, balanced flavor |
| 85°F – 90°F | 2 hours | Faster rise, slightly less complex flavor |
Tips for Perfect Proofing
For optimal proofing results, ensure that your kitchen is at a comfortable temperature, around 75°F – 85°F. If you’re looking for a sweet treat to pair with your Kaiser rolls, consider making some Swedish candy to satisfy your cravings.
Common Mistakes to Avoid
When shaping and proofing Kaiser rolls, it’s essential to avoid common mistakes, such as overworking the dough or proofing the rolls for too long. Keep an eye on your rolls and adjust the proofing time as needed to achieve the perfect balance of flavor and texture.
Baking the Kaiser Rolls to Perfection
The moment of truth arrives when baking the Kaiser rolls to perfection, as this process requires precision and patience. With the right techniques and temperatures, you can achieve a crispy, golden-brown crust and a soft, airy interior that will make your Kaiser rolls truly unforgettable.
Preheating and Temperature Control
To begin, preheat your oven to 400°F (200°C), ensuring that it reaches the optimal temperature for baking Kaiser rolls. This step is crucial, as it will help to create a crispy crust and a well-cooked interior. Here are the steps to follow:
- Place the Kaiser rolls on a baking sheet lined with parchment paper, leaving about 1 inch of space between each roll.
- Gently brush the tops with melted butter or egg wash for added flavor and browning.
- Bake the Kaiser rolls for 15-20 minutes, or until they reach a golden-brown color.
Achieving the Perfect Crust
The key to achieving the perfect crust is to create a steam-filled environment during the baking process. This can be done by placing a pan of water on the bottom rack of the oven or by using a steamer basket. Some other tips to keep in mind:
- Use a pizza stone or baking steel to enhance crust browning and crispiness.
- Rotate the baking sheet halfway through the baking time to ensure even cooking.
- Monitor the temperature closely, as it can affect the final texture and flavor of the Kaiser rolls.
Timing and Cooling
Once the Kaiser rolls are baked to perfection, it’s essential to cool them properly to preserve their texture and flavor. Here’s a comparison of different cooling methods:
| Cooling Method | Time | Result |
|---|---|---|
| Wire rack | 30-40 minutes | Crispy crust, soft interior |
| Paper bag | 20-30 minutes | Soft crust, tender interior |
| Cooling tray | 40-50 minutes | Crunchy crust, airy interior |
| For a delicious breakfast idea, consider serving your freshly baked Kaiser rolls with a side of strawberry waffles, using our Simple Strawberry Waffles Recipe. |
Troubleshooting Common Issues
If you encounter any issues during the baking process, such as overproofing or underbaking, don’t worry. Here are some troubleshooting tips:
- Check the yeast expiration date and ensure it’s active.
- Adjust the oven temperature and baking time as needed.
- Use a thermometer to monitor the internal temperature of the Kaiser rolls.
Cooling and Storage Techniques
As you take your freshly baked Kaiser rolls out of the oven, the aroma of warm bread fills the air, teasing your senses and building anticipation. Proper cooling and storage techniques are crucial to maintaining the crust and crumb texture of your Kaiser rolls, ensuring they remain fresh and delicious for a longer period.
Cooling Methods
To cool your Kaiser rolls, you can use the following methods:
- Wire rack cooling: Place the rolls on a wire rack to allow air to circulate around them, promoting even cooling.
- Paper bag cooling: Place the rolls in a paper bag to retain moisture and promote a softer crust.
- Cooling tray cooling: Use a cooling tray to speed up the cooling process and prevent soggy bottoms.
When cooling your Kaiser rolls, it’s essential to monitor the temperature and humidity levels to prevent stale or moldy bread. You can use a thermometer to check the internal temperature of the rolls, which should be around 90°F to 100°F (32°C to 38°C) after cooling.
Storage Options
For storing your Kaiser rolls, consider the following options:
- Store in an airtight container at room temperature for up to 2 days
- Freeze for up to 2 months and thaw at room temperature or reheat in the oven
- Refrigerate for up to 5 days, but note that this may affect the texture and flavor of the rolls
If you’re looking for a sweet treat to pair with your Kaiser rolls, consider trying our Classic Neapolitan Ice Cream Recipe for a refreshing dessert.
Troubleshooting Common Issues
Some common issues that may arise during the cooling and storage process include:
| Issue | Cause | Solution |
|---|---|---|
| Stale bread | Insufficient cooling or storage | Improve cooling and storage techniques |
| Moldy bread | High humidity or temperature | Monitor temperature and humidity levels |
| Soggy bread | Excessive moisture | Use a cooling tray or wire rack to promote air circulation |
Tips for Maintaining Freshness
To maintain the freshness of your Kaiser rolls, remember to:
- Store them in a cool, dry place
- Keep them away from direct sunlight and moisture
- Freeze or refrigerate them promptly if you won’t be consuming them within a day or two
Tips and Variations for Perfect Kaiser Rolls

Understanding the Role of Yeast in Kaiser Roll Recipe
The art of crafting a perfect Kaiser roll recipe lies in the delicate balance of ingredients, with yeast playing a crucial role in the process. As you embark on this baking journey, it’s essential to comprehend the significance of yeast in creating the light, airy texture and distinctive flavor of these Austrian bread rolls.
The Science Behind Yeast Fermentation
Yeast fermentation is a complex process that involves the conversion of sugars into carbon dioxide, causing the dough to rise. To facilitate this process, it’s vital to create an environment that fosters yeast growth. Here’s a step-by-step guide to yeast activation:
- Combine warm water (around 100°F to 110°F) with a small amount of sugar to create a nourishing environment for the yeast.
- Add the yeast to the mixture and gently stir to distribute it evenly.
- Allow the mixture to sit for 5-10 minutes, or until it becomes frothy and bubbly, indicating that the yeast is active.
Factors Affecting Yeast Activity
Several factors can impact yeast activity, including temperature, humidity, and the presence of inhibiting ingredients. For instance, high temperatures can kill yeast, while low temperatures can slow down the fermentation process. To optimize yeast activity, it’s essential to maintain a consistent temperature between 75°F and 80°F. Additionally, using high-quality ingredients, such as unbleached flour, can help create a favorable environment for yeast growth.
Some key ingredients to consider when working with yeast include:
- Active dry yeast
- Instant yeast
- Fresh yeast
- Sugar
- Salt
Troubleshooting Common Yeast-Related Issues
When working with yeast, it’s not uncommon to encounter issues such as over-proofing or under-proofing. To troubleshoot these problems, it’s essential to understand the signs of yeast activity and adjust your recipe accordingly. For example, if your dough is over-proofed, it may collapse during baking, resulting in a dense, flat Kaiser roll. To avoid this, try reducing the proofing time or using a lower yeast concentration. If you’re looking for more tips on working with yeast, be sure to check out our article on How to Make Refreshing Passion Fruit Juice: Easy Recipes, which includes a section on using yeast in fermentation.
Optimizing Yeast Performance
To optimize yeast performance, it’s crucial to monitor the dough’s temperature, hydration level, and proofing time. By maintaining a consistent environment and adjusting your recipe as needed, you can create a perfectly balanced Kaiser roll with a light, airy texture and a rich, yeasty flavor.
Achieving the Perfect Crust and Crumb
The art of crafting a flawless Kaiser roll lies in its crust and crumb. A delicate balance of crunch and softness, the perfect Kaiser roll is a symphony of textures and flavors. To achieve this harmony, it’s essential to understand the intricacies of yeast fermentation, temperature control, and gentle handling.
Understanding Yeast Fermentation
Yeast fermentation is the backbone of a well-structured crumb. To facilitate this process, ensure your dough is at an ideal temperature, between 75°F and 78°F. This warmth encourages yeast activity, resulting in a light and airy texture. Proofing is also crucial, as it allows the dough to relax and redistribute yeast cells. Here’s a simple proofing process:
- Place the dough in a lightly oiled bowl, covering it with plastic wrap or a damp towel.
- Let it rest in a warm, draft-free area for 1-2 hours, or until it has doubled in size.
- Gently deflate the dough, and proceed with shaping.
Shaping and Scoring
Shaping and scoring are critical steps in developing the crust. Use a gentle touch when handling the dough to avoid over-working it. For a classic Kaiser roll shape, use a series of folds and twists to create the characteristic swirl. Scoring the dough before baking helps control the way it expands, creating a beautiful, crusty exterior. Some essential tools for shaping and scoring include:
- A lightly floured surface
- A dough scraper or bench knife
- A sharp razor or lame for scoring
Temperature and Baking
Temperature plays a significant role in achieving the perfect crust and crumb. Preheat your oven to 425°F (220°C), with a baking stone or baking steel inside, if possible. This high heat helps create a crispy crust, while the stone or steel promotes even baking. For an added layer of flavor, try baking your Kaiser rolls with a bit of steam. You can achieve this by placing a pan of water in the oven or using a steam injector. If you’re interested in exploring more recipes that incorporate steam, consider checking out our Simple Strawberry Waffles Recipe, which uses a similar technique to create a light and fluffy texture.
Troubleshooting Common Issues
Even with careful attention to detail, issues can arise. If your Kaiser roll is too dense, it may be due to over-mixing or insufficient proofing. On the other hand, a roll that’s too light and airy may have been over-proofed. Here’s a quick troubleshooting guide:
| Issue | Possible Cause | Solution |
|---|---|---|
| Dense roll | Over-mixing | Reduce mixing time, increase proofing time |
| Light roll | Over-proofing | Decrease proofing time, increase oven temperature |
Creative Fillings and Toppings for Kaiser Rolls
Kaiser rolls, with their soft, fluffy interior and crispy crust, are the perfect canvas for a wide range of creative fillings and toppings. Whether you’re in the mood for something classic and simple or adventurous and bold, the versatility of Kaiser rolls knows no bounds. From savory meats and cheeses to sweet jams and nuts, the possibilities are endless, making Kaiser rolls a staple in many cuisines.
For a refreshing twist, consider using a mango puree as a topping for your Kaiser rolls. This sweet and tangy addition can elevate your rolls, making them perfect for a summer brunch or dessert. For a detailed guide on making mango puree, check out How to Make an Amazing Mango Puree for Sweet and Savory Recipes.
Savory Delights
To create the perfect savory Kaiser roll, start by selecting a few key ingredients. Some popular options include:
- Cured meats like prosciutto or salami
- Artisanal cheeses such as gouda or cheddar
- Fresh herbs like parsley or rosemary
- Spreads like hummus or tapenade
Here’s a simple recipe to get you started:
- Preheat your oven to 375°F (190°C).
- Slice your Kaiser roll in half and toast until lightly browned.
- Spread a layer of your chosen spread on the bottom half of the roll.
- Add sliced meats, cheeses, and herbs to taste.
- Top with the other half of the roll and serve immediately.
Sweet Treats
For a sweeter take on the Kaiser roll, try filling it with jam, honey, or nutella. You could also add some chopped nuts or dried fruit for extra texture and flavor. To take your sweet Kaiser roll to the next level, consider pairing it with a refreshing drink like the Hugo Spritz. This classic Italian drink is made with prosecco, elderflower syrup, and soda water, and is perfect for warm weather or special occasions.
International Inspirations
Kaiser rolls can also be used as a base for international-inspired dishes. For example, you could fill them with Korean BBQ beef, Indian-style chicken tikka, or Mexican carnitas. The key is to experiment with different flavors and ingredients until you find a combination that you love. Here are a few ideas to get you started:
- Korean-style Kaiser roll: filled with marinated bulgogi beef, kimchi, and cilantro
- Indian-style Kaiser roll: filled with chicken tikka, mint chutney, and cucumber raita
- Mexican-style Kaiser roll: filled with carnitas, sliced avocado, and sour cream
Tips and Variations
When it comes to filling and topping your Kaiser rolls, the most important thing is to have fun and be creative. Don’t be afraid to try new ingredients and combinations – you never know what you might discover. Some other tips to keep in mind include:
- Using high-quality ingredients to ensure the best flavor and texture
- Experimenting with different types of cheese, meats, and spreads
- Adding some fresh herbs or spices to give your Kaiser roll an extra boost of flavor
- Trying out different cooking methods, such as grilling or toasting, to add some extra texture and flavor to your roll
Troubleshooting Common Issues in Kaiser Roll Baking
Kaiser roll baking can be a delicate process, and even the most experienced bakers may encounter issues. From overproofing to underbaking, these common mistakes can affect the texture and flavor of your Kaiser rolls. In this section, we’ll explore the most common problems and provide you with practical solutions to ensure your Kaiser rolls turn out perfect every time.
Common Issues and Solutions
When it comes to Kaiser roll baking, one of the most common issues is overmixing the dough. This can lead to a dense and tough crumb. To avoid this, make sure to mix your ingredients just until they come together in a shaggy mass. Then, let the dough rest for a few minutes before kneading. Here are some tips to keep in mind:
- Use a stand mixer with a dough hook attachment to minimize overmixing
- Keep your ingredients at room temperature to ensure they mix evenly
- Don’t overwork the dough during the kneading process
Temperature and Proofing Issues
Temperature and proofing are critical factors in Kaiser roll baking. If your dough is too cold, it won’t rise properly, and if it’s too hot, it will overproof. To achieve the perfect rise, make sure your dough is at a temperature of around 75°F to 80°F (24°C to 27°C). Here’s a step-by-step guide to proofing your dough:
- Place the dough in a lightly oiled bowl, cover it with plastic wrap, and let it rise in a warm, draft-free area.
- Check the dough after 1 hour to see if it has doubled in size.
- If it hasn’t, let it rise for another 30 minutes and check again.
Dealing with Dense or Flat Rolls
If your Kaiser rolls turn out dense or flat, it may be due to underbaking or overbaking. To ensure your rolls are baked to perfection, make sure to check them frequently during the baking process. You can also try baking them at a higher temperature for a shorter amount of time. For example, try baking them at 425°F (220°C) for 12-15 minutes. If you’re looking for more recipe ideas, be sure to check out our 10 Delicious Cottage Cheese Recipes You Need to Try Today for some inspiration.
Preventing Crust Issues
A good crust is essential to a delicious Kaiser roll. To prevent crust issues, make sure to score your rolls deeply enough to allow them to expand during baking. You can also try brushing the crust with egg wash or melted butter to give it a golden brown color. Here are some tips to keep in mind:
- Use a sharp blade to score the rolls
- Score the rolls just before baking to prevent the cuts from closing up
- Brush the crust with egg wash or melted butter for a golden brown color
Serving and Enjoying Your Homemade Kaiser Rolls
Traditional Austrian Ways to Serve Kaiser Rolls
Indulge in the rich flavors of Austria with a freshly baked Kaiser roll, perfectly complemented by a variety of traditional serving methods. From hearty breakfasts to satisfying snacks, the versatility of Kaiser rolls knows no bounds.
Breakfast Delights
Start your day with a delicious Kaiser roll breakfast, featuring scrambled eggs, smoked salmon, and a sprinkle of dill. To prepare, simply:
- Toast the Kaiser roll until lightly browned.
- Top with a dollop of cream cheese and a slice of smoked salmon.
- Garnish with fresh dill and a squeeze of lemon juice.
Some popular breakfast combinations include:
- Avocado and feta cheese
- Cured meats and pickles
- Grilled vegetables and hummus
Mid-Morning Snacks
For a satisfying mid-morning snack, try pairing your Kaiser roll with a warm beverage, such as coffee or tea. You can also explore various spreads, like strawberry jam or honey, to add a touch of sweetness. Consider visiting our Gouda Cheese Recipes page for inspiration on creating the perfect cheese platter to accompany your Kaiser rolls.
Lunchtime Favorites
Elevate your lunch game with a Kaiser roll filled with an assortment of meats, cheeses, and vegetables. Some popular fillings include:
- Roast beef and cheddar cheese
- Turkey breast and avocado
- Grilled chicken and bacon
Evening Delights
As the day comes to a close, enjoy your Kaiser roll as a side to a warm, comforting bowl of soup. The crispy crust and soft interior of the roll provide a delightful contrast in texture to the smooth, savory broth.
Modern Twists and Recipes Using Kaiser Rolls
The versatility of Kaiser rolls knows no bounds, as these soft, fluffy breads can be transformed into a myriad of delicious creations. From savory sandwiches to sweet treats, the possibilities are endless, and it’s time to think outside the box when it comes to this Austrian staple.
Savory Delights
To create a satisfying snack or light meal, try filling your Kaiser roll with an assortment of ingredients, such as:
- Cured meats (e.g., ham, salami)
- Artisanal cheeses (e.g., brie, gouda)
- Fresh herbs (e.g., parsley, rosemary)
- Crunchy vegetables (e.g., bell peppers, cucumbers)
Here’s a simple recipe to get you started:
- Slice the Kaiser roll in half lengthwise.
- Layer your chosen ingredients on the bottom half.
- Top with the other half of the roll.
- Serve immediately and enjoy the combination of flavors and textures.
Sweet Treats
For a sweeter take on the Kaiser roll, consider using it as a base for desserts like strudel or danish. You can also try making a Kaiser roll version of Simple Strawberry Waffles, by topping the roll with fresh strawberries, whipped cream, and a drizzle of honey. The result is a sweet and satisfying treat that’s perfect for any time of day.
International Inspirations
To give your Kaiser rolls a global twist, look to international cuisines for inspiration. For example, you could fill your rolls with spicy Korean BBQ beef or tangy Indian chicken tikka. The key is to experiment with different flavor profiles and find the perfect balance of spices and seasonings.
Tips and Variations
When working with Kaiser rolls, it’s essential to remember that the type of flour used can affect the final texture. For a more tender crumb, try using a combination of all-purpose and bread flour. You can also add aromatics like garlic or onion to the dough for an extra depth of flavor. Here’s a comparison of different flour types and their effects on the final product:
| Flour Type | Crumb Texture | Flavor Profile |
|---|---|---|
| All-purpose | Soft, tender | Mild, slightly sweet |
| Bread flour | Chewy, dense | More robust, slightly nutty |
| Whole wheat | Coarser, nuttier | Earthier, more complex |
Pairing Kaiser Rolls with Soups, Salads, and Spreads
The art of pairing flaky Kaiser rolls with an assortment of soups, salads, and spreads is a culinary journey worth embarking on. With their crunchy crust and soft interior, Kaiser rolls provide the perfect accompaniment to a variety of dishes, elevating each bite to a new level of flavor and texture. Whether you’re in the mood for something classic or adventurous, the versatility of Kaiser rolls ensures that you’ll always find a delightful combination to satisfy your cravings.
Pairing with Soups
When it comes to pairing Kaiser rolls with soups, the options are endless. For a comforting and satisfying combination, try serving your Kaiser rolls alongside a warm, aromatic bowl of creamy tomato soup. To take it to the next level, follow these steps:
- Preheat your oven to 375°F (190°C) to toast your Kaiser rolls.
- Slice the rolls in half and fill with a sprinkle of grated cheese.
- Place the rolls on a baking sheet and bake for 5-7 minutes, or until golden brown.
- Serve the toasted Kaiser rolls on the side of your favorite soup for a crunchy contrast in texture.
Some popular soup pairings for Kaiser rolls include:
- Creamy broccoli soup
- Spicy black bean soup
- Rich and creamy mushroom soup
Pairing with Salads
Kaiser rolls can also be paired with a variety of salads, adding a crunchy texture and flaky flavor to each bite. For a refreshing and healthy option, try serving your Kaiser rolls alongside a colorful mixed green salad with an assortment of tangy toppings. You can also visit our page on 5 Creative Variations of Dense Bean Salad You Need to Try for more inspiration on how to create the perfect salad to pair with your Kaiser rolls.
Pairing with Spreads
For a quick and easy snack, try pairing your Kaiser rolls with an assortment of creamy spreads. Some popular options include:
- Tangy hummus
- Rich and buttery brie cheese
- Sweet and sticky honey
To take your snack to the next level, try adding some crunchy toppings such as chopped nuts or fresh herbs.
Freezing and Reheating Kaiser Rolls for Later Use
Freshly baked Kaiser rolls are a delight, but what if you want to enjoy them later? The good news is that you can freeze and reheat them to maintain their freshness and flavor. This section will explore the best ways to freeze and reheat Kaiser rolls, ensuring you can savor their crusty exterior and soft interior whenever you want.
Freezing Kaiser Rolls
To freeze Kaiser rolls, you’ll need to cool them completely on a wire rack. This is crucial to prevent sogginess and maintain their texture. Once cooled, you can place them in a single layer in a freezer-safe bag or container. It’s essential to press out as much air as possible before sealing to prevent freezer burn. You can store them in the freezer for up to 3 months.
Here are some tips for freezing Kaiser rolls:
- Freeze them as soon as possible after baking to preserve freshness
- Use airtight containers or freezer bags to prevent moisture and other flavors from affecting the rolls
- Label the containers with the date and contents, so you can easily keep track of how long they’ve been frozen
Reheating Kaiser Rolls
Reheating Kaiser rolls is a straightforward process. You can reheat them in the oven or microwave. For the oven method:
- Preheat your oven to 350°F (175°C).
- Wrap the Kaiser rolls in foil to maintain moisture.
- Heat them for 5-10 minutes, or until they’re warmed through.
If you prefer the microwave method:
- Wrap the Kaiser rolls in a damp paper towel to prevent dryness.
- Heat them on high for 20-30 seconds, or until they’re warmed through.
For a delicious breakfast or snack, try serving your reheated Kaiser rolls with a variety of toppings, such as butter, jam, or cheese. You can also use them as a base for sandwiches or toast. If you’re looking for more recipe ideas, be sure to check out our navy bean recipes for some tasty and healthy meal ideas.
Troubleshooting Common Issues
When freezing and reheating Kaiser rolls, you may encounter some common issues, such as stale or dry rolls. To avoid this, make sure to freeze them as soon as possible after baking and reheat them properly. You can also try refreshing them in the oven or microwave before serving.
In conclusion, freezing and reheating Kaiser rolls is a great way to enjoy them at your convenience. By following these simple steps and tips, you can maintain their freshness and flavor, and enjoy them whenever you want. So go ahead, bake a batch of Kaiser rolls, freeze them, and reheat them later to savor their delicious taste and texture.
7 thoughts on “Kaiser Roll Recipe: How to Make Delicious Rolls at Home”